Your BJJ Guide
Master BJJ – One Position at a Time
  • Articles
  • Instructionals
    • BJJ Instructionals
    • Gordon Ryan Instructionals
    • John Danaher Instructional
    • Best Instructionals for Beginners
    • The Best Instructionals Older Grapplers
  • GI & Gear
    • BJJ GIs Under $100
    • Gi Brand List
    • How to Wash and Care for Your BJJ Gear
    • IBJJF Gi Requirements
    • Japanese Gi Brands
  • Learn BJJ
    • 3 Ways to Learn BJJ
    • BJJ for Beginners
    • Concepts vs System-Based
    • Ecological Approach
    • How Your Brain Learns BJJ
    • Learn BJJ at Home
  • BJJ Near Me
  • Injury Guides
    • BJJ Recovery
    • Most Common BJJ Injuries
    • Avoiding Cauliflower Ear BJJ
    • Jiu Jitsu Knee Injuries
  • About
  • Search

Gordon Ryan Camping Passing System

Affiliate Disclaimer: This review contains affiliate links. If you purchase through them, I may earn a commission at no extra cost. Thank you for supporting the site!

Gordon Ryan Camping Passing System: Principles, Drills, and How to Add It to Your Game

Gordon Ryan’s camping passing system is one of the clearest examples of modern no-gi guard passing: patient, positionally dominant, and built around forcing the bottom player into bad reactions before committing to the final pass.

The idea is simple, but not easy. Instead of sprinting around the guard or diving into a pass too early, you “camp” in strong passing positions. You win inside position, control the hips, limit the guard player’s legs, and wait until their defensive structure starts to break. Then you pass.

This article breaks down the principles behind Gordon Ryan-style camping passing, how to improve your own version of it, the best ways to drill it, and how to add it to your game without turning every round into a slow stalemate.

If you want to study Gordon’s material directly, you can also explore Gordon Ryan videos on BJJ Fanatics. Add your preferred product or affiliate URL to that link before publishing.

What Is Camping Passing in BJJ?

Camping passing is a guard passing strategy where the top player settles into a dominant intermediate position before finishing the pass. Instead of treating guard passing as one explosive movement, you treat it as a series of control points.

Common camping positions include headquarters, body lock passing, chest-to-chest half guard, split squat passing positions, knee cut control, leg drag control, and loose passing positions where the top player has already beaten one or both legs but has not fully settled into side control or mount.

The key is that camping is not stalling. Stalling means you are avoiding progress. Camping means you are making small positional improvements while the bottom player carries the burden of escape.

That distinction matters. A good camping passer is constantly improving head position, hand position, hip connection, knee position, and angle. They may look slow, but they are not passive.

Why Gordon Ryan’s Passing Looks So Hard to Stop

Gordon Ryan’s passing is difficult to deal with because he rarely gives the bottom player clean, explosive opportunities. He does not simply rush into frames. He does not overcommit his weight without controlling the hips. He does not chase the pass while leaving his legs exposed to entanglements.

Instead, he tends to build layered control. He wins a stable position, removes the opponent’s preferred guard retention tools, forces a reaction, and then advances when the reaction creates a clear opening.

This fits the broader pattern of Gordon’s instructional style. He teaches systems, not isolated moves. If you are comparing where this fits in his library, the Gordon Ryan instructionals ranking is a useful place to start.

The Core Principles of Gordon Ryan-Style Camping Passing

1. Win the Inside Space First

Most good guard players need inside position to retain guard, off-balance you, or enter leg attacks. Camping passing starts by denying that space.

In practice, this means your knees, elbows, hands, and head are constantly fighting for the inside lanes. You want your knees inside their knees, your elbows tight, and your head positioned where it blocks their ability to sit up, invert, or create a strong angle.

If the bottom player wins inside space first, your passing becomes reactive. If you win it first, their retention becomes reactive.

2. Control the Hips Before You Chase the Shoulders

A common mistake in guard passing is reaching for the upper body too early. Side control feels close, so the passer dives for the head, crossface, or underhook before actually controlling the hips.

Good camping passing reverses that priority. The hips are the engine of guard retention. If the bottom player can freely turn, shrimp, invert, or bring their knees back inside, your upper-body control will not last.

This is why body lock passing, headquarters, and chest-to-chest half guard are so central to modern no-gi passing. They all make hip movement harder before the pass is fully complete.

3. Make the Bottom Player Carry Your Weight

Camping passing should feel heavy, but not sloppy. The goal is not to collapse forward and hope pressure solves the problem. The goal is to place your weight where it limits the bottom player’s strongest movements.

Good pressure often comes through the chest, shoulder, head, hips, and knees. Bad pressure comes from leaning too far forward, posting your hands on the mat, or allowing the bottom player to load you onto their legs.

When done well, camping passing forces the guard player to work harder than the passer. They must frame, pummel, recover knees, turn their hips, and defend the next pass while carrying pressure.

4. Force Predictable Reactions

Gordon-style passing is powerful because it creates predictable defensive choices. If the bottom player turns away, you attack the back or consolidate control. If they turn in, you flatten them, crossface, or switch to another pass. If they frame hard, you change angles. If they open their knees, you staple, split, or step through.

This is the real value of camping. You are not waiting for a random opening. You are putting the guard player in a position where their reactions become easier to read.

For a broader explanation of why systems matter more than random technique collecting, see concept vs system-based BJJ instructionals.

5. Pass in Layers, Not in One Jump

Many beginners think guard passing means going directly from “in the guard” to “past the guard.” Better passers think in layers.

A camping-style sequence might look like this:

  1. Enter headquarters or body lock range.
  2. Win inside position and deny knee recovery.
  3. Control the hips and force the bottom player flat or sideways.
  4. Clear one leg or staple it.
  5. Clear the second leg or force half guard.
  6. Settle chest-to-chest, side control, mount, or back exposure.

Each layer removes an escape option. By the time the pass happens, the bottom player is not losing because of one mistake. They are losing because several defensive layers have already been stripped away.

The Main Camping Positions to Study

Headquarters

Headquarters is one of the best positions for learning camping passing because it teaches you to control one leg while keeping multiple passing options available.

From headquarters, you can knee cut, backstep, smash pass, leg drag, force half guard, or switch to outside passing. The position gives you time to read the bottom player’s frames and hip movement.

The main goal is to avoid being too loose. If your hips are high, your hands are extended, and the bottom player can freely pummel their legs back inside, you are not camping. You are just standing in front of the guard.

Body Lock Passing

Body lock passing is one of the clearest forms of no-gi camping. You attach to the hips, lock your hands, control distance, and slowly work past the legs.

The strength of the body lock is that it removes space. The weakness is that if your head position, shoulder position, or leg positioning is poor, you can get elevated, framed, or caught in leg entanglements.

To improve your body lock camping, focus less on squeezing and more on alignment. Your head should help block movement. Your shoulder should pin the hips. Your legs should stay active so you can tripod, sprawl, windshield-wiper, and clear hooks.

Chest-to-Chest Half Guard

Many camping passes end in chest-to-chest half guard. This is where patient passers can wear people down, but it is also where lazy passers get stuck.

Your priorities are underhook control, crossface pressure, hip control, and freeing your trapped leg without giving the bottom player an underhook or knee shield. Gordon’s broader top game connects well with this kind of half guard passing, and the Gordon Ryan half guard instructional review is a useful related read.

Knee Cut Control

The knee cut can be a fast pass, but it can also be a camping position. Once your knee is across the thigh line and you have shoulder or underhook control, you can pause, settle, and work through the bottom player’s frames.

The mistake is sliding your knee across without controlling the upper body or far hip. That often gives the bottom player space to underhook, turn onto their side, or recover guard.

How to Improve Your Own Camping Passing

Start With One Entry

Do not try to copy every Gordon Ryan passing sequence at once. Pick one entry into a camping position. For most people, headquarters or body lock passing is the best place to start.

Your first goal is not to finish every pass. Your first goal is to reliably arrive in the camping position without getting swept, entangled, or immediately pushed away.

Measure Control Before Completion

If you only judge success by whether you passed, you may miss the skill that actually matters. In the beginning, measure whether you can hold the camping position for three to five seconds against real resistance.

Ask these questions:

  • Can I stop the bottom player from bringing both knees inside?
  • Can I keep my hands safe from easy attacks?
  • Can I stop them from sitting up into me?
  • Can I keep my weight connected without getting loaded onto their legs?
  • Can I force them to turn in a predictable direction?

Use Pressure Without Becoming Static

The danger of camping passing is that it can become lazy. You settle into a position, feel heavy, and stop improving. Against good guard players, that gives them time to rebuild frames and recover.

Camping should always include micro-adjustments. Move your knee a little deeper. Improve your head position. Replace a hand post with shoulder pressure. Walk your hips lower. Clear the bottom hook. Change the angle when the frame becomes strong.

Connect Camping to Existing Passing Styles

You do not need to become a Gordon Ryan clone to benefit from this system. Add camping principles to the passes you already use.

If you like knee cuts, learn to pause in knee cut control before forcing the finish. If you like torreando passing, use movement to force the guard player flat, then settle into headquarters instead of circling forever. If you like half guard passing, improve how you arrive chest-to-chest before freeing the trapped leg.

For a broader comparison of passing styles, read best BJJ passing instructionals: pressure vs mobility passing.

The Best Drills for Camping Passing

Drill 1: Headquarters Hold and Recover

Start in headquarters. The top player’s goal is to hold the position and prevent the bottom player from recovering both knees inside. The bottom player’s goal is not to sweep at first. Their only goal is guard recovery.

Run rounds of 30 to 60 seconds. If the bottom player recovers guard, reset. If the top player stabilizes, they can begin adding a knee cut, backstep, or smash pass finish.

This drill teaches the difference between standing near the guard and actually controlling the guard.

Drill 2: Body Lock Camping Rounds

Start with the top player already attached in a body lock. The bottom player has frames and active legs. The top player must keep the lock, avoid being elevated, and gradually clear the legs.

At first, the top player only needs to hold and improve position. Later, add the pass finish. Finally, let the bottom player attack leg entries, underhooks, or technical stand-ups.

Drill 3: Three-Second Pass Completion

Many students pass the legs but lose the position immediately. This drill fixes that.

The top player must pass and hold side control, mount, or a dominant pin for three seconds. If the bottom player turns in, turtles, recovers guard, or creates a scramble before the count, the pass does not count.

This teaches the final layer of camping passing: consolidation.

Drill 4: Bottom Player Has One Escape Goal

Give the bottom player a single goal, such as recovering knee shield, sitting up, inverting, or entering legs. The top player’s job is to camp and shut down that one response.

This helps you build specific answers instead of trying to solve every guard retention problem at once.

Drill 5: Constraint-Led Passing Games

Constraint-led games are especially useful for camping passing because they force both partners to solve live problems without turning every rep into full sparring.

For example, start in headquarters. The top player can only pass by knee cut or backstep. The bottom player can only recover guard or wrestle up. This creates realistic reactions while keeping the problem small enough to study.

For more examples, use constraint-led games that build better guard passing.

How to Add Camping Passing to Your Game

Week 1: Choose Your Camping Position

Pick one position: headquarters, body lock, or chest-to-chest half guard. Do not split your attention yet.

Watch or study only the sections that explain entry, control, and the first layer of defense. Ignore advanced follow-ups until you can arrive in the position during live rounds.

Week 2: Add Positional Sparring

Start every positional round from your camping position. Your goal is to hold, improve, and pass. Your partner’s goal is to recover guard, wrestle up, or create distance.

Keep the rounds short. One-minute rounds are enough. You want frequent resets and clear feedback.

Week 3: Add One Pass Finish

Once you can hold the position, add one finish. If you are in headquarters, choose knee cut or backstep. If you are body locking, choose one leg-clearing method. If you are chest-to-chest half guard, choose one method for freeing your knee line.

Do not add five finishes. One reliable finish is better than a menu of half-trained options.

Week 4: Add One Reaction Counter

Now study what people are doing to stop you. Are they framing your shoulder? Recovering knee shield? Sitting up? Inverting? Turning away?

Add one answer to the most common reaction. This is where your camping passing starts becoming a system instead of a single position.

Common Mistakes to Avoid

Mistake 1: Confusing Camping With Resting

If you are not improving position, you are probably just resting. Camping should create pressure, fatigue, and predictable reactions. It should not give the bottom player unlimited time to rebuild guard.

Mistake 2: Leaning Too Far Forward

Many passers try to create pressure by leaning their chest forward. That often makes them easier to elevate, frame, or enter into leg attacks. Good pressure comes from connected weight and alignment, not falling onto the opponent.

Mistake 3: Ignoring the Bottom Player’s Knees

The knees are often the guard player’s best defensive tools. If both knees come back inside, your pass usually resets. Camping passing should constantly deny knee recovery.

Mistake 4: Passing Without Pinning

Clearing the legs is not enough. The pass only matters if you settle into control. Train the pin after the pass as seriously as the pass itself.

Mistake 5: Studying Too Much at Once

Gordon Ryan’s instructionals can be detailed. That is useful, but it can also overwhelm you. Study one chapter, one position, and one reaction at a time. Then test it in training before moving on.

If you need a broader structure for using online courses without getting lost, read how to build a complete BJJ game using online instructionals.

Who Should Study Gordon Ryan’s Camping Passing?

This style is best for intermediate and advanced no-gi students, but beginners can still benefit if they focus on the principles rather than trying to copy every detail.

You should study camping passing if:

  • You keep rushing passes and getting recovered on.
  • You struggle to hold people down after clearing the legs.
  • You want a slower, more systematic no-gi passing game.
  • You like body locks, headquarters, half guard passing, and pressure passing.
  • You want to understand why elite passers look patient without becoming passive.

You may want a simpler passing instructional first if you are still learning basic posture, closed guard opening, or how to avoid common sweeps.

Final Thoughts

Gordon Ryan’s camping passing system works because it turns guard passing into a controlled sequence of problems. You win inside space, control the hips, make the bottom player carry your weight, force predictable reactions, and pass only when the defensive structure is already weakened.

To add it to your game, start small. Pick one camping position, drill it with resistance, measure control before completion, and add one finish at a time. The goal is not to move slowly for its own sake. The goal is to make your opponent’s guard retention harder with every second you spend on top.

When done well, camping passing feels patient, heavy, and inevitable. That is the real lesson to take from Gordon Ryan’s approach: do not chase the pass. Build the position until the pass becomes the obvious next step.
Explore Gordon Ryan’s Instructionals

Best BJJ Passing Instructionals: Pressure vs Mobility Passing

Best BJJ Passing Instructionals: Pressure Passing vs Mobility Passing

Guard passing is one of the hardest skills to build in Brazilian Jiu-Jitsu because the bottom player is not just lying there waiting to be passed. They are framing, recovering, off-balancing, inverting, wrestling up, and constantly changing the problem in front of you.

That is why the best BJJ passing instructional is not always the one with the most techniques. The best choice is the one that matches your body type, rule set, current problems, and preferred passing style. Some grapplers need pressure passing. Others need mobility passing. Many need a simple bridge between the two.

This guide breaks down how to choose a passing instructional, when to prioritize pressure vs mobility, which passing styles make sense for beginners and blue belts, and how to actually study the material so it shows up in live rolling.

Quick Answer: What Is the Best BJJ Passing Instructional?

The best BJJ passing instructional for most beginners and early intermediates is one that teaches a complete passing system instead of isolated moves. You want a course that explains distance management, inside position, hip control, leg pummeling, and how to settle after the pass.

If you are still building your overall learning strategy, start with a broader resource like the YourBJJGuide BJJ instructionals guide so you can see where guard passing fits into your larger game.

For most students, the best passing instructional will fall into one of these categories:

  • Best for beginners: a fundamentals-based passing course that covers posture, grips, knee cuts, toreando-style movement, and basic pressure.
  • Best for pressure passers: a body lock, over-under, half guard passing, or chest-to-chest passing system.
  • Best for mobility passers: a course built around torreando, leg drags, outside passing, angle changes, and re-directions.
  • Best for no-gi: a system that emphasizes inside position, headquarters, body locks, knee wedges, and pinning without relying on gi grips.
  • Best for competitors: a system that connects entries, counters, pass completion, and pinning under resistance.

Pressure Passing vs Mobility Passing: The Main Difference

Before buying or studying any passing instructional, decide whether you are trying to pass through the guard or around it.

Pressure passing means you use weight, connection, wedges, head position, underhooks, body locks, and hip control to slowly remove the guard player’s ability to move. You are not trying to sprint around the legs. You are trying to make the bottom player carry your weight while you climb into better positions.

Mobility passing means you use speed, angles, grips, footwork, re-directions, and timing to beat the guard player’s frames before they can build strong connections. You are not trying to crush through every layer. You are trying to force reactions and pass during transitions.

Neither style is automatically better. The best passers usually blend both. They threaten movement to make the guard player react, then use pressure when the reaction creates a good connection. Or they start with pressure, force the guard player to extend, then switch to a mobility pass.

When Pressure Passing Is the Better Choice

Pressure passing is often the better study focus if you keep getting tangled in guards, lose balance when you move fast, or struggle to hold the position after you pass. It gives you a slower, more stable way to advance.

Pressure passing works especially well if:

  • You prefer top control over speed scrambles.
  • You are bigger, older, less explosive, or more patient.
  • You train mostly no-gi and need passing options without sleeve and collar grips.
  • You get stuck in half guard, knee shield, butterfly half, or seated guard.
  • You pass sometimes but cannot stabilize side control or mount afterward.

Good pressure passing instructionals should teach more than “put your weight on them.” Look for details on head position, shoulder pressure, hip height, knee wedges, underhooks, crossfaces, and how to stop the guard player from turning onto their side.

Pressure Passing Styles Worth Studying

Body lock passing: This is one of the most important no-gi passing styles because it limits hip movement and reduces the guard player’s ability to create distance. A good body lock instructional should cover hand position, head placement, leg splitting, tripod pressure, and how to avoid getting elevated.

Over-under passing: This is a classic pressure style that works well in gi and no-gi. It can be excellent for slower, methodical grapplers, but it requires careful head positioning and awareness of triangles, kimuras, and back exposure.

Half guard passing: Many pressure passers build their entire top game around forcing half guard, winning upper-body control, and passing from there. If you already like chest-to-chest pressure, half guard passing instructionals can be a strong investment.

Headquarters passing: Headquarters is a bridge between pressure and mobility. You pin one leg, manage distance, and choose between knee cuts, leg drags, smash passes, or backsteps depending on the bottom player’s reactions.

When Mobility Passing Is the Better Choice

Mobility passing is often the better study focus if you feel too slow, too predictable, or too easy to frame. It teaches you to change angles before the guard player builds strong connections.

Mobility passing works especially well if:

  • You are lighter, faster, or comfortable moving on your feet.
  • You train in the gi and can use pant, sleeve, or collar grips to steer the legs.
  • You keep getting stuck chest-to-chest without actually clearing the guard.
  • You want to pass open guard before it becomes half guard.
  • You compete under rules where advantage, pace, and initiative matter.

Good mobility passing instructionals should not just show highlight-reel movement. They should explain distance, stance, grip fighting, direction changes, when to disengage, and when to switch from fast passing into heavy control.

Mobility Passing Styles Worth Studying

Torreando passing: The torreando is one of the clearest examples of outside passing. You control the legs, move around the guard, and force the bottom player to turn and recover. It is especially useful in the gi, but the footwork concepts carry into no-gi.

Leg drag passing: Leg drags combine mobility with control. You redirect the hips, pin the legs across the centerline, and move toward the back or side control. A good leg drag course should explain both the entry and the stabilization phase.

Knee cut passing: The knee cut sits between pressure and mobility. You need angle, timing, and knee position, but you also need shoulder pressure and underhook control to finish. This is one of the best passing systems for beginners to study because it teaches so many universal passing ideas.

Outside passing chains: Some instructionals focus on linking torreando, leg drag, knee cut, and backstep options together. These are useful once you understand the individual passes but need better transitions.

Best Passing Instructional Type by Belt Level

The best instructional for you depends heavily on where you are in your development. A white belt and a purple belt may both need “guard passing,” but they do not need the same information.

White Belts: Start With Posture, Distance, and Simple Pins

White belts should not start with a highly specialized passing system that assumes strong base, grip fighting, and positional awareness. Start with fundamentals: posture in closed guard, standing safely, opening the guard, knee cut basics, torreando basics, and how to settle into side control.

If you are still learning how online courses fit with normal academy training, read how to choose the right BJJ instructional for your game before buying another long course.

Blue Belts: Build a Primary Passing Lane

Blue belts should choose one main passing lane and study it deeply. That might be knee cut to headquarters, body lock to half guard, torreando to leg drag, or over-under to side control. The goal is not to know every pass. The goal is to have one reliable way to create pressure and force predictable reactions.

This is also where you should start connecting your passing study to live training. For example, if your instructional teaches knee cut entries, spend several weeks starting rounds from headquarters or open guard rather than waiting for random chances during full rolling.

Purple Belts and Above: Study Counters and Transitions

More advanced grapplers usually do not need another isolated pass. They need better answers to resistance. Study how strong guard players counter your passing style, then learn how to chain into second and third options.

If your body lock gets framed, where do you go? If your knee cut is blocked, do you backstep, switch sides, or move to leg drag? If your torreando fails, can you force headquarters instead of restarting completely?

How to Choose the Right Passing Instructional

Use this simple decision tree before buying or committing to a passing course.

1. Identify the Guard You Lose To Most

Do you struggle with closed guard, knee shield, seated guard, butterfly guard, lasso, De La Riva, reverse De La Riva, or flexible open guard players? Choose a passing instructional that solves your most common problem first.

A body lock passing course may be excellent, but it will not help much if your main issue is standing up safely in closed guard. A torreando course may be great, but it will not solve your half guard passing problems if you keep getting trapped chest-to-chest without an underhook.

2. Match the Course to Your Training Rules

Gi and no-gi passing overlap, but the gripping environment changes everything. Gi players can rely more on pants, collars, sleeves, lapels, and grip breaks. No-gi players need more emphasis on head position, wrist control, underhooks, body locks, and leg pummeling.

If you train mostly no-gi, be careful with instructionals that depend heavily on sleeve and pant grips. If you train mostly gi, do not ignore no-gi passing concepts, but make sure the course shows how to use gi grips responsibly.

3. Look for Systems, Not Technique Collections

A strong passing instructional should answer the “what next?” question. What do you do when the guard player frames? What if they invert? What if they sit up? What if they underhook your leg? What if they recover half guard?

That is the difference between a technique list and a system. For a deeper breakdown of this learning difference, see concept vs system-based BJJ instructionals.

4. Choose a Course You Can Actually Train

The best instructional is not useful if it requires training partners, mat time, or physical attributes you do not have. If you train twice per week, choose a narrow passing system you can test repeatedly. If you are recovering from injury or training for longevity, choose passing styles that prioritize control and efficiency over explosive movement.

Recommended Study Path for Passing

If you are not sure where to start, use this progression:

  1. Closed guard opening: learn how to posture, stand, and open safely.
  2. Knee cut basics: learn inside position, underhooks, and angle changes.
  3. Headquarters passing: learn to pin one leg and force predictable reactions.
  4. Body lock or over-under passing: add a pressure system for no-gi and half guard situations.
  5. Torreando and leg drag chains: add movement-based passing once your base is stable.
  6. Pass completion: study how to settle into side control, mount, or back exposure after clearing the legs.

This path works because it gives you both stability and movement. You learn how to avoid getting swept, then how to force reactions, then how to connect your passes into a reliable top game.

How to Train a Passing Instructional So It Works in Rolling

Watching a passing instructional is easy. Turning it into a skill is the hard part.

Start with one chapter or one passing problem. Do not try to watch six hours and “add it to your game.” Pick one entry, one control point, and one finish. Then bring that exact situation into drilling, positional sparring, and live rounds.

A simple weekly plan might look like this:

  • Day 1: watch one short section and write down the main control points.
  • Day 2: drill the entry with light resistance.
  • Day 3: start positional rounds from that passing position.
  • Day 4: review what failed and rewatch only the relevant section.
  • Next week: add one counter or follow-up.

If you want a broader framework for organizing online study, use this guide to building a complete BJJ game with online instructionals.

Use Constraint-Led Games to Make Passing Stick

One of the best ways to test a passing instructional is to turn the material into small games. Instead of drilling a pass with no resistance, create a narrow problem where both partners have realistic goals.

For example:

  • Headquarters game: top player starts in headquarters and must pass; bottom player must recover guard or off-balance.
  • Body lock game: top player starts with a body lock; bottom player tries to frame, pummel, or recover knee shield.
  • Torreando game: top player can only pass outside; bottom player tries to retain guard without standing up.
  • Pass-and-hold game: top player must pass and hold side control for three seconds before the round ends.

This approach helps you learn the actual decision-making behind the instructional. For more ideas, read constraint-led games that build better guard passing.

Common Mistakes When Studying Passing Instructionals

Trying to Learn Too Many Passes at Once

Guard passing improves faster when you build a small family of connected options. A knee cut, backstep, leg drag, and body lock connection is more useful than ten unrelated passes you barely understand.

Ignoring the Guard Player’s Reactions

Passing is not a solo movement. The bottom player’s frames, hips, grips, and knees determine what is available. Good instructionals teach reactions. Pay attention to those details, not just the first move.

Passing Without Stabilizing

Clearing the legs is not the same as completing the pass. If the bottom player immediately turns in, turtles, wrestles up, or recovers guard, your pass is not finished. Study the pin after the pass.

Choosing a Style That Does Not Fit Your Training

If you are a slower pressure passer, do not build your whole game around speed-based outside passing without also learning control. If you are light and mobile, do not force a slow smash passing style without learning how to create angles first.

Final Recommendation

The best BJJ passing instructional is the one that helps you solve your most common passing problem in live training. If you get stuck in half guard and knee shield, choose pressure passing, body locks, headquarters, or half guard passing. If you struggle to get around open guards, choose torreando, leg drag, knee cut, and outside passing systems.

For most beginners and blue belts, the smartest path is to build one pressure lane and one mobility lane. Learn how to force headquarters or half guard, then learn how to move around the legs when the guard player overcommits to framing. That combination gives you a passing game that can adapt instead of relying on one perfect scenario.

Study slowly, test the material in positional rounds, and focus on repeatable control points. A good passing instructional should not just give you more moves. It should help you understand how to stay balanced, create pressure, change angles, clear the legs, and hold the position after the pass.

Best Guard Retention Instructionals for Beginners

Best Guard Retention Instructionals for Beginners and Blue Belts

If you are a beginner or blue belt in Brazilian Jiu-Jitsu, guard retention is one of the highest-value skills you can study. It is the difference between constantly getting passed and flattened versus staying in the fight long enough to attack, recover, or stand back up.

The problem is that guard retention can feel hard to learn from random clips alone. Good retention is built on timing, frames, hip movement, and understanding what the passer is trying to take away. That is why choosing the right instructional matters. If you are still sorting through broader options, our main BJJ instructionals guide is a good place to start.

In this article, we will break down what beginners and blue belts should look for in a guard retention instructional, which coaches are usually the best fit, and how to choose a course that actually helps your rolling instead of just giving you more things to memorize.

Affiliate disclosure: This article may contain affiliate links. If you purchase through them, YourBJJGuide may earn a commission at no extra cost to you.

Why Guard Retention Should Be a Priority Early

Many newer grapplers want to study sweeps, submissions, or flashy entries first. That is understandable, but guard retention often gives faster returns. If you cannot stop the pass, you will rarely get enough time to use your offense.

For most white belts and blue belts, better guard retention leads to:

  • More time to think under pressure
  • Fewer rounds spent stuck in side control
  • Better confidence from open guard and half guard
  • Cleaner transitions into sweeps, wrestle-ups, and submissions

This is also why beginners often benefit from pairing retention study with broader beginner material like the best BJJ instructionals for beginners. A good guard retention course works even better when it sits on top of solid fundamentals.

What Beginners and Blue Belts Should Look for in a Guard Retention Instructional

Not every guard retention course is built for the same student. Some are highly detailed and competition-focused. Others are more conceptual and easier to apply right away. For most early learners, the best instructionals have a few things in common.

1. Clear framing and inside-position concepts

You want an instructor who explains why your knees, shins, elbows, and hands matter. Beginners do better when they understand the basic battle for inside position instead of trying to memorize twenty unrelated recovery moves.

2. A focus on common passing situations

The best beginner-friendly courses deal with problems you actually see in class: toreando movement, knee-cut pressure, body lock pressure, leg drag threats, and loose outside passing. If the course starts too far into advanced inversions or niche reactions, it may not be the right first buy.

3. Recoveries that work without elite flexibility

Some guard retention systems lean heavily on inversion ability. There is nothing wrong with that, but beginners usually need options that still work when tired, late, or slightly out of position.

4. Concepts plus a few reliable reactions

The sweet spot is a course that teaches both. Concepts tell you what matters. Reactions tell you what to do next. If you are unsure whether you learn better from principles or tightly organized sequences, read our guide to concept-based vs system-based instructionals.

Best Guard Retention Instructionals for Beginners and Blue Belts

1. Lachlan Giles

Lachlan Giles is one of the safest recommendations for beginners who want to improve guard retention without getting buried in unnecessary complexity. He is excellent at explaining distance, alignment, pummeling your legs back inside, and choosing the right recovery based on the passer’s angle.

Why he is a strong fit:

  • Clear conceptual teaching
  • Retention details that scale from beginner to advanced
  • Practical reactions for common no-gi passing patterns

Best for: white belts, blue belts, and smaller grapplers who want a technical understanding rather than a highlight-reel style of guard.

2. John Danaher

John Danaher is a strong option for analytical students who want a very structured explanation of defensive layers, body alignment, and retention priorities. His material is usually dense, but it rewards patient study. If you like slow, system-driven teaching, Danaher makes a lot of sense.

Why he is a strong fit:

  • Very detailed explanations of defensive structure
  • Strong emphasis on concepts that connect retention to escapes and overall defense
  • Good choice for long-term understanding

Best for: learners who do not mind longer instructionals and want a full system instead of quick fixes.

3. Gordon Ryan

Gordon Ryan is often associated with passing and offense, but his defensive instructionals can still be useful for beginners and blue belts, especially if you want a modern no-gi lens. His teaching is generally more direct than Danaher’s, and he tends to focus on what works at a high percentage under resistance.

Why he is a strong fit:

  • Modern no-gi relevance
  • Direct teaching style
  • Useful for students who want retention connected to the rest of a competitive game

Best for: motivated beginners and blue belts training mostly no-gi.

If Gordon’s style appeals to you, it may also help to look at our Gordon Ryan instructionals ranking before choosing where to start.

4. Priit Mihkelson

Priit’s approach is more defensive and posture-driven than many mainstream instructionals, which makes him especially valuable for students who panic once passing pressure starts to build. His material can feel different from standard sport-BJJ instruction, but that is part of the appeal.

Why he is a strong fit:

  • Strong emphasis on survival and defensive composure
  • Useful for older grapplers and cautious beginners
  • Helps students stop overreacting and exposing bigger openings

Best for: beginners who get overwhelmed by pressure or older students trying to train more efficiently. That same logic is why he also fits the profile in our instructionals guide for older grapplers.

Which Type of Guard Retention Instructional Should You Buy First?

If you are a white belt, your first guard retention instructional should usually be one that teaches broad concepts and a small number of reliable recoveries. You do not need an encyclopedia yet. You need something that helps you survive common passes this month.

As a simple rule:

  • Choose Lachlan Giles if you want the best mix of clarity, practicality, and concept-driven teaching.
  • Choose John Danaher if you like detailed systems and do not mind longer study sessions.
  • Choose Gordon Ryan if you mainly train no-gi and want a modern competitive style.
  • Choose Priit Mihkelson if your biggest issue is surviving pressure without panicking.

If you are still not sure, step back and ask what kind of problem you are actually trying to solve. That is the same decision process we outline in how to choose the right BJJ instructional for your game.

Common Mistakes When Studying Guard Retention

Trying to learn every recovery at once

Retention improves faster when you build around a few core reactions first: frame, recover inside position, square up, and reconnect to guard.

Watching more than you train

One useful detail applied live is worth more than an hour of passive watching.

Ignoring the passer’s goal

Guard retention gets easier when you understand what the top player needs. Are they beating your knees? Pinning your hips? Forcing chest exposure? Solve that problem first.

Separating retention from the rest of your game

Retention is not just defense. It should connect to off-balancing, wrestle-ups, half guard entries, and re-guarding patterns. A good course helps you build those links over time, much like building a complete BJJ game with online instructionals one position at a time.

Final Verdict

For most beginners and blue belts, the best guard retention instructional is the one that makes common passing situations feel understandable instead of chaotic. In practice, that usually means starting with a coach who teaches clear concepts, realistic reactions, and recoveries you can use before your timing is perfect.

If you want the safest all-around recommendation, Lachlan Giles is a very strong first choice. If you want a deeper system, go with John Danaher. If you want modern no-gi relevance, Gordon Ryan is worth a look. And if survival under pressure is your main problem, Priit Mihkelson can be an excellent fit.

Whatever you choose, keep the goal simple: get passed less, recover faster, and give yourself more chances to actually play jiu-jitsu.

How to Drill BJJ Escapes So They Actually Work in Live Rolling

If your escapes work in drilling but disappear the moment a training partner adds pressure, you are not alone. That happens to a lot of BJJ students, especially in their first few years. The usual problem is not that you need more random reps. It is that your practice does not look enough like the problem you are trying to solve.

Good escape training builds timing, posture, frames, and decision-making under pressure. It teaches you when to move, not just where to put your limbs. If you are still building your overall foundation, our guide on how to learn BJJ is a helpful place to zoom out and organize your training.

In this article, you will learn how to drill escapes so they actually transfer to live rolling, which mistakes make escape practice feel fake, and how to structure a simple weekly approach that helps you improve faster.

Why Escape Drills Often Fail in Sparring

Most bad escape drilling has one thing in common: the bottom player already knows what is coming, and the top player is barely trying to stop it. That creates movement memory, but not escape skill.

In live rolling, escapes depend on several things happening at once:

  • You have to recognize the exact kind of pressure you are under.
  • You need enough structure to stay safe while you create space.
  • You must time your movement when the top player shifts weight or attacks.
  • You need a follow-up once the first opening appears.

If your drilling removes all of those variables, it can still be useful, but only as a first step. To make escapes work against resistance, you need practice that gradually adds realism.

What Good Escape Training Actually Builds

Effective escape practice is less about collecting techniques and more about building a few reliable habits:

  • Finding frames before panic starts.
  • Protecting your neck and inside space.
  • Moving your hips before trying to bench-press someone off you.
  • Connecting one escape attempt to the next instead of treating each move as isolated.
  • Recovering to a meaningful position such as guard, turtle, or standing.

This is also why many coaches now use more live and game-based formats. If you want a deeper look at that idea, see ecological rolling for beginners, which explains how focused live situations can speed up learning.

A Better 4-Step Progression for Drilling Escapes

1. Start With Clean Mechanical Reps

At the beginning, it is fine to rehearse the basic shape of the movement. If you are working on a side control escape, for example, you might focus on frame placement, hip movement, and getting your knee back inside.

Keep this stage simple:

  • Use a cooperative partner.
  • Move slowly enough to notice details.
  • Do short sets with feedback between reps.
  • Focus on one escape pathway at a time.

This stage matters, but do not stay here too long. Mechanical reps teach you the map, not the drive.

2. Add Predictable Resistance

Once the movement is clear, have the top player give realistic pressure while still allowing the bottom player to work on the same task. The resistance should be honest, but limited.

Examples:

  • Top player holds side control and tries to stay chest-to-chest, but does not attack submissions.
  • Top player in mount stays heavy and follows the hips, but does not switch to a high mount or back take.
  • Bottom player has one clear win condition: recover guard, get to turtle, or stand up.

This stage teaches you whether your frames and timing hold up when the other person is not helping.

3. Use Constraint-Based Rounds

This is where transfer usually improves the most. Instead of full sparring right away, narrow the situation and give both players a clear job.

For example:

  • Start under side control. Bottom wins by regaining guard or coming to the knees. Top wins by holding for 30 seconds.
  • Start in mount. Bottom can only escape through elbow-knee recovery. Top can attack position but not submissions.
  • Start in back control. Bottom must first clear hand control before doing anything else.

If you want ready-made training formats like this, these ecological BJJ games are a strong companion resource.

4. Blend Escapes Into Full Rolling

After specific rounds, go into open sparring with one clear escape goal. Do not try to fix every weak area at once. Pick one theme for the session, such as:

  • Finding inside frames before turning.
  • Escaping side control without exposing your back.
  • Recovering guard instead of exploding to turtle every time.

This lets you test whether the lesson survives a less predictable round.

Key Coaching Cues That Improve Most Escapes

Different positions have different details, but a few cues show up again and again:

  • Frame first, move second. If you try to shrimp or bridge without structure, you usually just burn energy.
  • Move your hips, not just your arms. Good escapes come from angle changes and space creation, not upper-body force.
  • Win a small battle before the big one. Get an elbow inside. Clear a crossface. Trap a post. Do not skip steps.
  • Expect follow-up reactions. A strong top player will adjust. Your first escape attempt often creates the opening for the second.
  • Define the finish. Know whether you are trying to recover guard, come on top, or stand up.

Common Escape Drilling Mistakes

Drilling Too Fast

Fast reps can hide bad posture. Slow enough is usually better, especially early.

Using a Passive Top Partner

If the top player is just posing, the bottom player never learns how pressure changes the position.

Resetting After Every Failed Attempt

Real escapes often happen on the second or third effort. Let rounds continue long enough for chaining and adjustment.

Practicing Too Many Escapes at Once

It is better to own one reliable mount escape and one reliable side control escape than to vaguely remember six options.

Ignoring Recovery Position

Escaping the pin is not enough if you immediately give the position back. Finish in guard, turtle, or on top with intention.

A Simple Weekly Plan for Better Escapes

If escapes are a real weakness, try this structure for two to four weeks:

  • Day 1: Mechanical reps plus predictable resistance from one position.
  • Day 2: Constraint rounds from that same position.
  • Day 3: Open rolling with one escape theme in mind.
  • Day 4: Review what kept failing and tighten one detail, not five.

You can also support that process by studying one area at a time instead of bouncing between unrelated techniques. Our article on building a complete BJJ game with instructionals follows the same idea from a broader training perspective.

When Instructionals Can Help

If you keep getting stuck in bottom positions, a strong escape instructional can give you better structure and clearer concepts. The main thing is to use it to sharpen a current training problem, not as entertainment between classes.

For readers who want extra study material, this roundup of escape and survival instructionals is the most relevant internal next step.

Final Takeaway

The goal of escape drilling is not to look clean in a low-resistance rep. The goal is to stay composed under pressure, recognize openings, and recover to safety against someone who does not want to let you go.

If you want your escapes to work in live rolling, practice them in a way that teaches timing and decision-making, not just choreography. Start with clean reps, add realistic resistance, use focused live rounds, and carry one clear lesson into sparring. That is usually where escapes stop being theoretical and start becoming part of your game.

Triangle Choke Defense in BJJ

Triangle Choke Defense in BJJ for Beginners: Posture, Hand Position, and 3 Reliable Escapes

If you are new to Brazilian Jiu-Jitsu, the triangle choke can feel like it appears out of nowhere. One second you are inside closed guard, and the next your posture is broken, your arm is trapped, and your neck feels like it is disappearing. The good news is that triangle defense is not about frantic strength. It is mostly about recognizing the danger early, keeping sensible hand position, and knowing which escape makes sense for the stage you are in.

In this guide, you will learn how the triangle usually develops, what your first defensive priorities should be, and three reliable ways to escape without making the choke worse. If you are still building your overall foundation, it also helps to zoom out and focus on learning BJJ the right way so your defense improves along with the rest of your game.

Why Beginners Get Caught in Triangles So Often

The triangle usually comes from a few predictable mistakes:

  • Leaving one arm in and one arm out inside closed guard
  • Letting your posture collapse forward
  • Reaching too far with your hands
  • Trying to yank your head free after the legs are already locked
  • Driving straight forward while the bottom player is cutting an angle

The common thread is loss of structure. Once your elbow drifts across your centerline and your head comes down, your opponent does not need much space to climb into the attack.

Your First Priorities in Triangle Defense

Before thinking about a specific escape, organize your defense around three priorities:

  1. Posture first. Get your head and chest up whenever you still can.
  2. Protect the trapped side. Do not allow your trapped arm to drift deeper across your body.
  3. Deny the angle. A triangle gets much tighter when your opponent turns off to the side. Your job is to stay square when possible, then recover a safer position before the choke is fully locked.

If you remember nothing else, remember this: bad posture creates the triangle, and panic usually finishes it.

Defense 1: Recover Posture Before the Triangle Is Fully Locked

This is the best-case scenario. Your opponent has started to throw the legs up, but they have not fully broken you down and locked the triangle yet.

What to do:

  • Bring your head up immediately.
  • Keep both elbows tight rather than reaching outward.
  • Drive your trapped-side elbow back toward your own ribs.
  • Use your free hand to manage the top leg or control the hip so the angle does not develop.
  • Back your posture out and return to a square base.

The goal here is not to win with force. It is to interrupt the setup before your opponent can clamp the position. Many beginners waste this moment because they react too late and only start defending once the choke already feels serious.

Defense 2: Stand and Stack Once the Triangle Is Locked

If the legs are already locked and your posture is compromised, the stand-and-stack escape is one of the most dependable beginner options when taught properly.

Key details:

  • Keep looking up. Dropping your head makes the choke tighter.
  • Control your opponent’s leg line so they cannot keep cutting a sharper angle.
  • Come to your feet with balance instead of exploding upward.
  • Drive your weight forward carefully so their knees move toward their chest.
  • As the angle collapses, begin pulling your trapped arm back and freeing your head.

The stack works because it reduces your opponent’s ability to stay angled and finish comfortably. It also forces them to carry more of their own weight. If you want more structured study around survival and escape mechanics, YourBJJGuide already has a useful roundup of the best instructionals for escapes and survival.

What to avoid:

  • Trying to bench-press them off you
  • Pulling straight backward without fixing the angle first
  • Leaving your trapped arm dangling across their torso

Defense 3: Create Space, Hide the Shoulder, and Circle to Safety

Sometimes the triangle is locked, but the stack is not immediately available or your posture is too broken to stand cleanly. In that case, your next job is to create enough space to reduce the choke before you try to extract yourself.

What to do:

  • Use your free hand to frame and give your neck a little room.
  • Keep your chin up rather than curling into the choke.
  • Work your trapped shoulder back so it is less exposed across the centerline.
  • Circle toward the safer side only after you have reduced the pressure.
  • Once your head is clear, immediately return to posture and base.

This escape is less about one dramatic movement and more about rebuilding layers of safety in the right order. If you are drilling outside class, pairing this with a few rounds of controlled solo movement can help, and YourBJJGuide’s guide on learning BJJ at home gives a reasonable way to structure that extra practice.

The Mistakes That Make a Triangle Worse

Plenty of triangle escapes fail not because the idea was wrong, but because the reaction made the choke tighter first. Watch out for these common errors:

  • Posturing late. If you wait until everything is tight, every defense becomes harder.
  • Crossing your trapped arm too far. This makes the shoulder line easy to compress.
  • Driving in with your head down. You are helping the finish.
  • Ignoring the angle. The triangle often becomes dangerous because the bottom player turns, not just because they lock the legs.
  • Panicking and thrashing. You burn energy and usually expose even more space.

How to Drill Triangle Defense Without Turning It Into a Fight

Triangle defense improves faster when you drill it in stages instead of always starting from a fully locked choke. A simple progression looks like this:

  1. Start with the setup only: one arm in, one arm out, and practice recovering posture.
  2. Start from a loose triangle and work the stand-and-stack escape with light resistance.
  3. Start from a tighter triangle and focus only on creating space before moving.
  4. Finish with positional rounds where the top player’s goal is only to survive and escape.

If you need extra material between classes, browsing a few well-chosen free BJJ instructionals can help you review details without overcomplicating the position.

When to Defend Early Versus When to Bail Out

A useful beginner rule is this:

  • If the legs are not locked yet, fight hard for posture and elbow position.
  • If the triangle is locked but not tight, stand and collapse the angle.
  • If the choke is already threatening, stop thinking about winning the position and first create enough space to breathe and recover safe alignment.

You do not need a flashy escape. You need the right response at the right moment.

Final Thoughts

Good triangle defense starts long before the submission is locked. It starts with disciplined posture inside guard, careful elbow position, and the habit of noticing danger before it becomes urgent. Once you understand those priorities, the escape itself becomes much less mysterious.

Expect to get caught while learning. That is normal. The goal is not to become impossible to submit overnight. The goal is to recognize the setup sooner, stay calmer, and make each defensive exchange more organized than the last.

BJJ Training Journal

BJJ Training Journal: What to Write After Class So You Actually Improve

Most BJJ students leave class with the same good intention: remember what worked, fix what failed, and come back sharper next time. Then life happens. By the next session, the key detail from drilling is fuzzy, the best round of the night is gone from memory, and the same mistakes show up again.

A simple training journal can fix that. Not because writing notes is magical, but because it helps you slow down, organize what happened, and give your next session a clear purpose. If you are serious about improving, journaling is one of the easiest habits to add to your routine.

If you are still building your overall learning process, our step-by-step guide on how to learn BJJ pairs well with this approach. A journal works best when it supports live training, not when it replaces it.

What a BJJ training journal should actually do

Your journal does not need to be long, clever, or beautifully organized. It only needs to do three things:

  • Help you remember important details from class
  • Show you recurring patterns in sparring
  • Give you one clear focus for the next session

That is it. Many people quit journaling because they try to write a full match breakdown after every class. That becomes a chore. A useful journal is short enough to keep doing and specific enough to guide your training.

This also fits what we know about skill development. If you want the bigger picture, read how your brain learns BJJ. The short version is simple: reflection, recall, and repeated exposure help technical details stick better than passive review.

What to write after every class

A strong post-class entry can be done in three to five minutes. Use this five-part structure.

1. The main theme of class

Write the position or problem that class focused on. Keep it basic.

  • Half guard knee shield retention
  • Standing guard breaks from closed guard
  • Single-leg finish when the opponent hops away

You are not trying to capture the entire lesson. You are labeling the training day so you can find it later.

2. One technical detail that changed the move

Pick one detail that clearly mattered. One. Not six.

  • My top shoulder had to stay heavy before switching hips
  • The underhook only worked when my head was tight under the chin
  • I finished the sweep easier when I moved my hips first, then pulled

This is usually the part people forget fastest, even though it is often the real reason a technique works.

3. The situations that kept showing up in sparring

This is where the journal becomes useful instead of theoretical. Ask yourself:

  • What position did I hit the most?
  • Where did I stall?
  • What did better partners do to me repeatedly?

Examples:

  • Kept getting flattened in half guard before I could build to my elbow
  • Lost closed guard as soon as opponents stood up
  • Won the underhook, but could not come up because my outside knee was too far away

These patterns matter more than random wins. They show you what your real training problems are.

4. One mistake to clean up

Choose the most common or costly mistake from the session. Be honest, but stay practical.

  • Reached with my arms instead of moving my hips
  • Accepted crossface pressure too early
  • Tried to force the submission after I lost position

A journal should not become self-criticism. It is just a record of what needs attention.

5. One focus for the next class

This is the most important line in the whole journal. End every entry with one next action.

  • Next class, I will fight for inside knee position before chasing the underhook
  • Next class, I will stand to open closed guard with posture first, not speed first
  • Next class, I will frame earlier instead of waiting until side control is fully settled

If you do only this part consistently, your training becomes much more intentional.

What not to write

Most bad BJJ journaling falls into one of these traps:

  • Writing every technique from class like a transcript
  • Listing every round without any conclusion
  • Filling pages with motivation instead of specifics
  • Collecting moves without identifying the actual problem

This is one reason BJJ is not about memorizing moves. Your notes should help you notice decisions, reactions, and recurring positions, not build a giant catalog you never use.

A simple BJJ journal template

If you want a fast format, use this after class:

  • Date:
  • Class theme:
  • One key detail:
  • Main sparring pattern:
  • Biggest mistake:
  • Next-class focus:

If you prefer a slightly deeper version, add:

  • Who gave me the most trouble, and why?
  • What reaction did I fail to anticipate?
  • What position should I study for 10 minutes before the next session?

How to review your notes without overcomplicating it

Do a quick review once per week. Look back over your last three to five sessions and ask:

  • Which position keeps returning?
  • Which mistake keeps repeating?
  • Am I missing a technical detail, a timing issue, or a decision-making issue?

That review gives you a better study target between classes. If you are using solo study time, our guide on how to learn BJJ at home can help you turn those notes into useful review instead of random scrolling.

If your notes point toward a bigger weakness in your overall game, it also helps to think in systems rather than isolated moves. This is exactly where building a complete BJJ game using online instructionals becomes useful. Your journal tells you what to study; structured instruction helps you study it in the right order.

Paper or phone?

Either works. The best choice is the one you will keep using.

Use a notebook if: you like writing by hand, want fewer distractions, or train in a gym where phones feel awkward.

Use your phone if: you want searchable notes, quick entries, and an easier way to tag positions like mount, half guard, wrestling, or back escapes.

Whatever you choose, keep the format consistent. Consistency matters more than the tool.

When journaling is especially useful

  • When you are a white belt and everything feels new
  • When you keep hitting the same problem in sparring
  • When you are returning after a break and need structure
  • When you are studying instructionals and need to connect them to live rounds
  • When progress feels slow and you want clearer evidence of improvement

A journal will not make you better by itself. But it will make your practice more honest, more focused, and easier to build on over time.

Final thoughts

The best BJJ training journal is not the most detailed one. It is the one that helps you notice what is happening, remember what matters, and show up next class with a better question.

If you keep your notes short and actionable, you will start seeing patterns faster. And once you can see the pattern, improvement gets a lot less random.

How to Train for ADCC Rules

How to Train for ADCC Rules in a Regular BJJ Gym

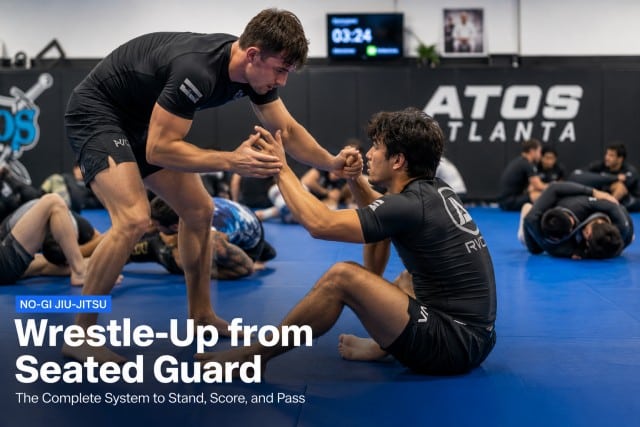
learn to wrestle up for you adcc competition

ADCC is not just “normal no-gi with heel hooks.” The ruleset changes how people wrestle, how they pace themselves, how they value top position, and how they take risks from guard. That is why many good gym grapplers feel sharp in regular rounds but look strangely uncomfortable when they try to compete under ADCC rules.

The good news is that you do not need a room full of elite wrestlers or a full-time competition team to prepare properly. You can build a lot of ADCC-specific skill inside a normal academy if you train with the right constraints, the right starting positions, and the right priorities. If you are still building your overall training structure, our guide on how to learn BJJ is a useful starting point.

What Makes ADCC Training Different?

ADCC places more value on initiative than many hobbyists realize. Even before the points period, the match often revolves around who is pushing the action, who is winning the hand fight, and who is forcing the other person to react. Once points begin, wrestling exchanges, guard passing pressure, back exposure, and clean top control become even more important.

That means ADCC training should emphasize:

  • starting from standing more often
  • strong front-headlock and go-behind awareness
  • wrestle-up ability from seated and supine guard
  • positional urgency without reckless scrambling
  • leg-lock awareness on both offense and defense
  • the ability to win top position and stay there

If your normal rounds begin from the knees, reset too quickly, or ignore scoring logic, you are probably leaving a big gap between your gym game and your competition game.

Start More Rounds From Standing

This is the simplest upgrade and probably the most important one. ADCC matches begin with wrestling, and even guard players need to understand the early hand-fighting phase. You do not need to turn your academy into a collegiate wrestling room, but you do need regular exposure to stance, level changes, collar ties, snaps, and basic finishes.

A good baseline is to start several rounds per week from standing with a clear goal: get to a clean takedown, front headlock, body lock, or safe guard pull that immediately connects to offense. For many BJJ athletes, a small set of dependable takedowns is better than chasing a large menu of techniques. That is especially true if you are a jiu-jitsu-first athlete rather than a lifelong wrestler.

If you want a practical model for this, see our look at lower-body takedown systems for BJJ, which fits well with ADCC-style training.

Build a Real Seated Guard and Wrestle-Up Layer

In ADCC, sitting to guard is not automatically a bad decision. The problem is sitting without a plan. If you choose to play guard, you need immediate connection: hands on the opponent, feet in useful places, off-balancing pressure, and a clear route into leg entries, wrestle-ups, or upper-body attacks.

A useful gym rule is this: if you sit, you must attack within a few seconds. No passive scooting. No waiting for the other person to make a mistake. Train yourself to connect your guard to action.

Good first layers include:

  • arm drags into rear angles
  • single-leg wrestle-ups
  • ankle picks off seated reactions
  • shin-to-shin entries
  • single-leg X or leg-entry transitions when opponents overcommit forward

This does not mean every guard exchange should become a leg-lock shootout. It means your guard should create meaningful dilemmas. If the opponent pressures in, you threaten elevation, off-balancing, or entanglements. If they disengage or posture too high, you come up on the legs.

Train the No-Points Period on Purpose

One common mistake is treating the opening phase like a waiting room. High-level ADCC competitors do the opposite. They use the early period to gather reactions, force scrambles, threaten front headlocks, and create fatigue without giving away easy scores later.

In the gym, try rounds where the first half is “no points, but not no purpose.” Your goals in that phase can be:

  • win the hand fight
  • force reactions from standing
  • create snap-down or wrestle-up opportunities
  • enter legs safely without exposing yourself carelessly
  • make the opponent carry your weight and defend repeatedly

Then switch to a scored phase where both players must immediately think in terms of position, control, and tactical discipline. This teaches you to connect early aggression with later scoring instead of treating them like separate matches.

Spend More Time in Front Headlock and Turtle Exchanges

ADCC-style grappling produces a lot of messy transitional positions. Snap-downs, failed shots, forced turtles, and short scrambles often decide who ends up on top. That makes front headlock work one of the best returns on investment for competitors.

You do not need a massive submission menu here. Focus first on:

  • controlling the head and near arm
  • circling cleanly to the back
  • breaking the opponent down when they build height
  • knowing when to threaten the guillotine versus when to prioritize position

A lot of athletes lose ADCC-style exchanges because they chase low-percentage submissions and give up the cleaner path to top control. In training, reward yourself for finishes, but reward yourself even more for consistently turning scrambles into dominant position.

Make Guard Passing More Urgent and More Honest

In many normal rounds, guard passing becomes too casual. People back out too far, reset without consequence, or spend long stretches touching the legs without real commitment. That habit carries badly into ADCC.

To sharpen your passing, add constraints that force pace and accountability. Short, live tasks work well here. Our article on constraint-led games for guard passing is especially useful if you want your rounds to become more competition-relevant without becoming mindless brawls.

Helpful passing constraints include:

  • 30 to 45 second passing rounds from open guard
  • top player must stay connected and cannot fully disengage
  • bottom player scores by standing up or forcing a clean reset
  • top player only wins with a stabilized pass, not just a brief chest touch

These rules teach better pressure, cleaner decision-making, and the kind of urgency ADCC often demands once points are live.

Do Not Treat Leg Locks as a Side Quest

Even if leg locks are not your best area, they shape the entire match. They affect stance, passing posture, seated-guard reactions, and scramble choices. You do not need to become a specialist overnight, but you do need enough familiarity to avoid panicking in common entanglements and enough offense to make opponents respect the threat.

For most BJJ athletes, the smart approach is conservative and layered:

  • learn safe entries and exits
  • understand when you are exposing your own heel
  • know how to clear the knee line and hide rotation
  • connect leg attacks to wrestle-ups and top position, not just submission hunting

If you study outside the gym, keep your learning structured rather than random. Our guides on the best BJJ instructionals and how to build a complete BJJ game with instructionals can help you choose material that actually supports your competition plan.

Use Short, Specific Positional Rounds

One of the fastest ways to adapt a normal gym to ADCC preparation is to stop relying only on full free sparring. Keep your normal rounds, but add focused situations that appear constantly in the ruleset.

Good ADCC-specific starting positions include:

  • standing hand fight to takedown or front headlock
  • seated guard versus standing passer
  • single-leg finish versus sprawl and whizzer
  • front headlock versus turtle
  • outside leg entanglement with both athletes hunting position first
  • guard pass almost completed, but not stabilized

These mini-rounds give you more meaningful repetitions than one long round where the same exchange appears only once.

Prepare Your Conditioning Around Repeated High-Tension Exchanges

ADCC cardio is not just “good gas tank.” It is the ability to repeatedly wrestle hard, recover quickly, and make clear decisions while tired. That usually means your conditioning should include short bursts of high effort with incomplete recovery, not just long steady work.

On the mat, that can look like:

  • multiple short standing rounds with fresh partners
  • snap-down and go-behind intervals
  • 30-second wrestle-up rounds from seated guard
  • takedown-to-pass sequences with immediate resets

Off the mat, recovery matters just as much as output. If you are increasing wrestling volume and scrambling intensity, pay attention to sleep, soreness, and joint stress. Our BJJ recovery guide is a strong companion piece for athletes pushing harder toward competition.

A Simple Weekly ADCC Layer for a Normal Gym

You do not need to overhaul every class. A realistic weekly structure might look like this:

  • 1 session with extra standing starts and takedown emphasis
  • 1 session focused on seated guard, wrestle-ups, and front headlocks
  • 1 session with ADCC-style positional rounds and scored/no-points match simulations
  • normal class rounds, but with fewer knee starts and quicker resets back to the feet when space allows

This is enough for many athletes to make major progress without changing gyms or training like a professional.

Final Thoughts

Training for ADCC in a regular BJJ gym is mostly about honesty. Be honest about how often you start from standing. Be honest about whether your guard leads to real offense. Be honest about whether you can finish takedowns, convert front headlocks, and hold top position when the pace rises.

If you build your rounds around those questions, you do not need a perfect room to become much more ADCC-ready. You just need better training design, consistent intent, and enough repetition in the positions that actually matter.

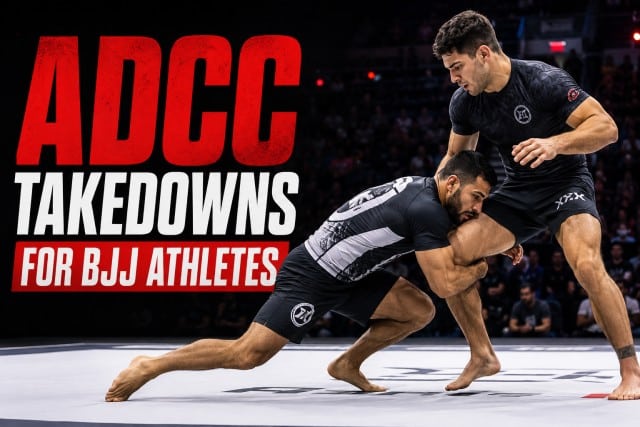
Best ADCC Takedowns for BJJ Athletes

Best ADCC Takedowns for BJJ Athletes Who Are Not Wrestlers

For many BJJ athletes, ADCC-style competition creates one immediate problem: the standing phase feels uncomfortable, rushed, and expensive. You do not need to become a former college wrestler overnight to fix that. What you do need is a small set of takedowns and standing attacks that match how jiu-jitsu athletes actually move, grip, and think.

This article breaks down the best ADCC takedowns for BJJ athletes who are not wrestlers. The focus here is not on flashy amplitude or deep wrestling chains. It is on reliable entries that fit no-gi grappling, protect you from bad scrambles, and connect naturally to front headlocks, guard pulls, body locks, and passing sequences. If you want broader context on the event itself, see our ADCC overview.

What Makes a Good ADCC Takedown for a BJJ Athlete?

A good ADCC takedown for a non-wrestler usually has four qualities:

  • It does not require elite penetration-step timing.
  • It keeps your head and posture reasonably safe.
  • It creates top position or immediate submission threats.
  • It connects well to the rest of a jiu-jitsu game.

That matters because most BJJ athletes are not trying to win long hand-fighting exchanges with pure wrestling pressure. They are trying to create an efficient opening, score if possible, and move quickly into the parts of grappling where they are strongest.

1. Snap-Down to Front Headlock

If you only develop one standing attack for ADCC, this is a strong candidate. The snap-down is accessible, low-risk compared with many committed shots, and leads directly to one of the most valuable positions in no-gi grappling: the front headlock.

Why It Works

Many BJJ athletes are more comfortable attacking the neck and upper body than finishing explosive leg attacks. A snap-down lets you turn hand fighting into a controlling, threatening position without needing perfect wrestling mechanics.

Basic Entry

  • Start from a collar tie, inside tie, or brief wrist control.
  • Move your opponent before you pull. Do not snap a stable stance.
  • Pull the head down as you angle off, rather than staying square in front.
  • Look to cover the head and an arm, then circle toward dominant control.

Best Use Cases

  • Against upright opponents with high posture.
  • Against athletes who reach heavily with collar ties.
  • As a reaction when your opponent pulls away from your grip.

Common Mistakes

  • Trying to yank straight down with only your arms.
  • Leaving your hips too close and getting re-shot on.
  • Snapping without angling off to a better line.

If you want a resource built around this more scrimmage-style approach to standing exchanges, our review of Systematically Attacking the Scrimmage is a useful next read.

2. Collar Tie to Ankle Pick

The ankle pick is one of the best options for BJJ athletes because it rewards timing, posture, and direction more than raw speed. It also works well from upright hand fighting that already feels familiar to many jiu-jitsu players.

Why It Works

You can threaten the head, force your opponent to step, and attack the leg when their weight becomes light. This makes it a strong choice for athletes who are not confident shooting deeply on doubles.

Key Cues

  • Pull the head slightly off line before you reach for the ankle.
  • Pick the ankle when the foot is light, not when the leg is heavily planted.
  • Drive your opponent into the space where the foot used to be.
  • Keep your chest over your lead knee so you do not overreach.

When It Fits ADCC

The ankle pick works especially well in matches where both athletes are cautious about overcommitting. It is efficient, hard to see when timed well, and often leads to clean top position without a big scramble.

Common Mistakes

  • Reaching for the ankle before affecting posture.
  • Picking from too far away.
  • Stopping after touching the ankle instead of driving through the finish.

3. Single Leg from an Outside Angle

The single leg still belongs on this list, but with one important adjustment: most BJJ athletes should think less about blasting through the middle and more about finding the outside angle first.

Why This Version Is Better for Non-Wrestlers

Shooting straight down the center can expose your neck, stall your motion, and leave you under a sprawl. By attacking from an angle, you often meet less resistance and keep better posture through the finish.

Simple Setup Ideas

  • Snap, then attack when your opponent rises back up.
  • Use wrist control to make them step.
  • Fake high, then enter low.
  • Circle toward the lead leg instead of chasing it from too far out.

Finishing Advice for BJJ Athletes

  • Get your head up early.
  • Lock above the knee if possible.
  • Come up to your feet rather than staying bent underneath.
  • If the finish stalls, transition to running the pipe, a shelf finish, or a rear body lock instead of forcing the first option forever.

This is also where style matters. Athletes with wrestling-heavy games, like Nicky Rodriguez, can often pressure through standing exchanges in ways that pure jiu-jitsu athletes cannot. For most BJJ competitors, the lesson is not to copy the athleticism. It is to copy the clarity of entries and the commitment to posture.

4. Arm Drag to Rear Body Lock

The arm drag is one of the cleanest bridges between jiu-jitsu and wrestling. It suits BJJ athletes because it uses connection, angle, and back exposure rather than a head-on collision.

Why It Works

Many grapplers are already comfortable using drags from seated guard, butterfly guard, and scrambles. Bringing that same idea to standing makes the transition feel natural.

What to Focus On

  • Pull the arm across your center line, not just downward.
  • Step to the outside immediately.
  • Do not admire the drag. Chase the angle.
  • Connect your hands around the waist or lock a seatbelt-style control as soon as you get behind.

Best Follow-Ups

  • Rear body lock mat return.
  • Trip from behind.
  • Return to the front headlock if they square up hard.

Common Mistakes

  • Dragging with no footwork.
  • Staying chest-to-chest after winning the angle.
  • Letting go too early and turning a good entry into a scramble.

5. Wrestle-Up from Seated Guard

This is the most BJJ-specific entry on the list, and for many non-wrestlers it may be the most realistic one to build first. Instead of forcing a pure standing exchange, you create a takedown from a guard situation you already understand.

Why It Is So Useful

If your seated guard is decent, the wrestle-up allows you to turn defensive-looking exchanges into offensive ones. It also fits the decision-making style of many ADCC competitors, who move fluidly between standing, seated guard, and leg-attack threats.

Good Triggers for the Wrestle-Up

  • Your opponent reaches too far with their hands.
  • Your opponent stands tall to avoid leg entanglements.
  • You create a reaction with foot-to-hip or shin-to-shin contact.
  • You get them stepping backward in a predictable line.

How to Keep It Clean

  • Come up with your head tight and your posture organized.
  • Do not stay extended on your knees.
  • Finish the action quickly into a single leg, body lock, or back take.

For an example of a highly technical no-gi athlete who built elite success without relying on a traditional wrestler’s style, see our profile on Lachlan Giles. His game is a reminder that smart entries and connected systems often matter more than having a classic wrestling background.

A Simple ADCC Takedown Strategy for Non-Wrestlers

If you are unsure where to start, keep the standing game narrow:

  • Primary attack: snap-down to front headlock.
  • Secondary attack: ankle pick when posture rises.
  • Committed leg attack: outside-angle single leg.
  • Positional attack: arm drag to rear body lock.
  • Guard-based option: wrestle-up from seated guard.

That is already enough to make you dangerous. The mistake many BJJ athletes make is trying to learn too many takedowns at once. A smaller system, trained consistently, usually gives better results than collecting ten techniques you cannot connect under pressure.

How to Train These Without Burning Out

  • Start every no-gi round with one minute of hand fighting from standing.
  • Pick one main attack for a full week, not one per round.
  • Drill the entry, the finish, and the bailout when it fails.
  • Add one follow-up attack so your game has a simple chain.
  • Review footage or instructionals that match your actual body type and style.

The goal is not to become a wrestler in a month. The goal is to become hard to outscore, hard to pressure, and capable of getting to your best jiu-jitsu without giving away easy openings.

Final Thoughts

The best ADCC takedowns for BJJ athletes who are not wrestlers are usually the ones that feel repeatable under stress. Snap-downs, ankle picks, outside-angle single legs, arm drags, and wrestle-ups all let you play a more jiu-jitsu-friendly standing game while still becoming a real threat on the feet.

If you can build just two or three of these into a connected system, your ADCC-style grappling will improve quickly. You do not need a huge wrestling playbook. You need a few reliable entries, disciplined posture, and enough repetition that the standing phase stops feeling like borrowed time.

  • 1
  • 2
  • 3
  • …
  • 13
  • Next Page »

BJJ Fanatics

BJJ Fanatics latest videos

BJJ Fanatics: The number one source on the internet with the best instructional videos and promotions.

Explore BJJ Fanatics Now

Scrimmage Takedowns

Gordon Scrimmage Lower-body takedowns

Gordon Ryan’s approach to scrimmage-based lower-body takedowns combines the precision of wrestling with the strategic timing of jiu-jitsu.

Explore Gordon’s Latest Video

Further Faster Bundle

Dahaner Go Further Faster Bundle

John Danaher Go Further Faster: Master the fundamentals with clarity and purpose—just like Danaher’s top students.

Further Faster Bundle Deal


Your BJJ Guide Copyright © 2026 ·

We use cookies to ensure that we give you the best experience on our website. If you continue to use this site we will assume that you are happy with it.