Your BJJ Guide
Master BJJ – One Position at a Time
  • Articles
  • Instructionals
    • BJJ Instructionals
    • Gordon Ryan Instructionals
    • John Danaher Instructional
    • Best Instructionals for Beginners
    • The Best Instructionals Older Grapplers
  • GI & Gear
    • BJJ GIs Under $100
    • Gi Brand List
    • How to Wash and Care for Your BJJ Gear
    • IBJJF Gi Requirements
    • Japanese Gi Brands
  • Learn BJJ
    • 3 Ways to Learn BJJ
    • BJJ for Beginners
    • Concepts vs System-Based
    • Ecological Approach
    • How Your Brain Learns BJJ
    • Learn BJJ at Home
  • BJJ Near Me
  • Injury Guides
    • BJJ Recovery
    • Most Common BJJ Injuries
    • Avoiding Cauliflower Ear BJJ
    • Jiu Jitsu Knee Injuries
  • About
  • Search

How to Escape Mount in BJJ

May 7, 2026 By yourbjjguide

How to Escape Mount in BJJ: Bridge-and-Roll, Elbow Escape, and Common Mistakes
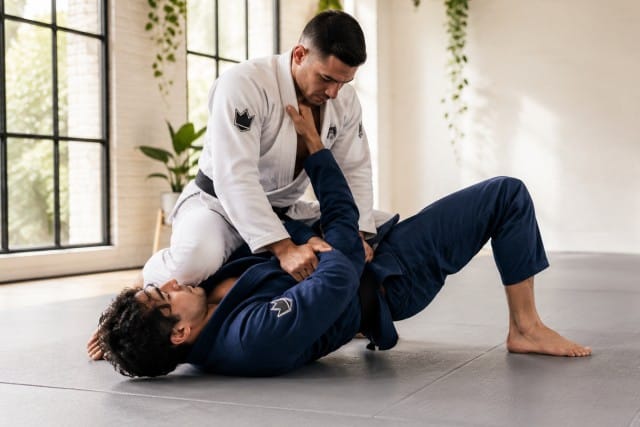
Mount is one of the first bad positions every BJJ student learns to hate. When someone settles their weight on top of you, controls your head, and starts climbing higher, it can feel like there is no space left to breathe, move, or think.

The good news is that mount escapes are not about exploding wildly or bench-pressing someone off you. They are about structure, timing, and choosing the right response for the kind of mount pressure you are dealing with. If you are still building your foundation, this is exactly the sort of defensive skill that belongs near the top of your priority list. If you are new to the art, our guide on how to learn BJJ explains why escapes and survival should come early in your development.

In this article, you will learn the two highest-value escapes most beginners should start with: the bridge-and-roll escape and the elbow escape. You will also learn when each one makes sense, what details matter most, and the common mistakes that keep people trapped under mount longer than they need to be.

What makes mount so difficult to escape?

Mount is powerful because the top player can attack while forcing you to carry their weight. They can follow your hips, climb higher on your torso, and use their hands to post whenever you try to buck them off balance.

That means mount escapes usually fail for one of three reasons:

  • The bottom player bridges without trapping anything.
  • The bottom player pushes with their arms instead of moving with their hips.
  • The bottom player waits too long and lets the top player settle into high mount.

Your first goal is not to launch a perfect reversal immediately. Your first goal is to survive well enough to start escaping with intention. new

Step 1: Build survival posture before you try to escape

Before you worry about reversing or recovering guard, protect yourself. A stable defensive posture from bottom mount gives you the few seconds you need to choose the right escape.

Focus on these habits first:

  • Keep your elbows tight to your ribs instead of reaching wide.
  • Use your forearms to block the top player from climbing too high.
  • Keep your chin tucked and avoid exposing your arms carelessly.
  • Plant your feet close enough to your hips that you can bridge hard when the moment comes.

If your feet are too far away and your elbows are flared, your escapes will feel weak even if you know the correct technique.

The bridge-and-roll escape: best when the top player posts poorly

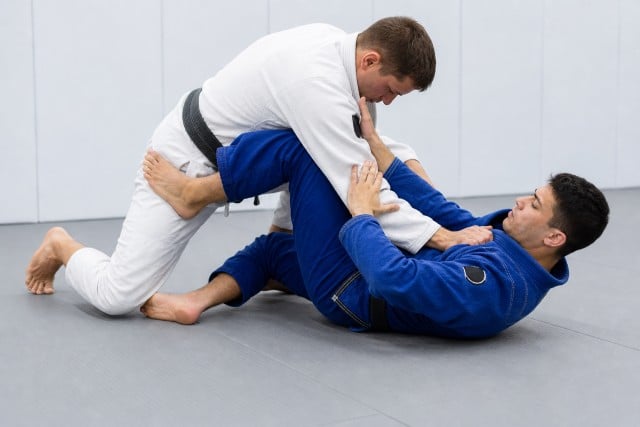
The bridge-and-roll escape, often called the upa, is one of the first mount escapes most people learn for a reason. It is simple, direct, and still works at every level when the top player gives you the right reaction.

When to use it

This escape is strongest when your opponent is in a lower mount and one of their arms becomes vulnerable to being trapped. It also works well when they are attacking, cross-facing aggressively, or posting their hand on the mat where you can isolate it.

Key steps

  1. Trap one arm by controlling the wrist and pinning the elbow tight to your body.
  2. On the same side, trap their foot by stepping over it or catching it with your foot so they cannot post the leg.
  3. Bring your heels close to your hips.
  4. Bridge up first to load their weight.
  5. Roll toward the trapped side at an angle, not straight sideways.

The detail most beginners miss is the direction of the bridge. Do not just throw yourself left or right. Drive your hips up high first, then turn the corner. If you skip the upward bump, the top player stays heavy and posts before your roll gets going.

Coaching cues that help

  • Think “trap, bump, roll,” in that order.
  • Glue the trapped elbow to your chest so the arm cannot slip free.
  • Roll toward the shoulder of the trapped arm, not toward empty space.

The elbow escape: best when you can make space at the knee line

The elbow escape is often the more reliable long-term answer because skilled top players are hard to reverse cleanly. Instead of trying to throw them over you, you create space and recover one of your legs back inside.

When to use it

Use the elbow escape when the top player is balanced, posting well, or staying low enough that a reversal is unlikely. This is also a strong follow-up after your bridge makes them adjust their base.

Key steps

  1. Bridge to force the top player to post or lighten their weight.
  2. As they settle back down, turn slightly onto your side.
  3. Use your elbow and forearm to create space near their knee, not up near their chest.
  4. Shrimp your hips away just enough to slide your bottom knee inside.
  5. Recover half guard or full guard depending on the space you create.

The elbow escape is not one giant motion. It is usually a series of small, stubborn wins: bridge, frame, shrimp, insert the knee, recover guard. If you try to do it all at once, you often give up inside space and get flattened again.

Coaching cues that help

  • Escape the knee line, not the head position first.
  • Shrimp only after your bridge creates a reason for their weight to shift.
  • Be happy recovering half guard if full guard is not available.

How the two escapes work together

Many beginners think they need to choose one mount escape and make it work no matter what. In practice, the best escapes come in pairs.

The bridge-and-roll makes the top player post. The elbow escape takes advantage of the space that appears when they widen their base. The elbow escape makes the top player pull their knee back or adjust their pressure. That reaction can reopen the reversal.

In other words, you should not think “Which single escape do I memorize?” Think “Which reaction does my first escape create?” That mindset helps you build a real system instead of a one-move answer.

Common mount escape mistakes

1. Bridging with flat feet too far away

If your feet are too far from your hips, you cannot generate enough lift. Bring them in before you explode.

2. Trying to bench-press the opponent

Pushing straight up with your arms burns energy and exposes your elbows. Use your hips, frames, and timing instead.

3. Forgetting to trap the foot on the upa

You can trap the arm perfectly and still fail if the top player posts their leg. Control the whole side before you commit.

4. Shrimping before creating space

If you try to hip-escape while the top player is fully settled, you usually just move yourself deeper into trouble. Bridge first, then shrimp.

5. Waiting until high mount is fully established

Once the top player climbs high under your armpits, escapes become much harder. Start working early, even if your first job is only to recover elbow position and deny the climb.

How to practice mount escapes so they actually improve

Mount escapes get better when you train them with increasing resistance, not only with static reps. Start with cooperative drilling so you understand the mechanics, then move into positional rounds where your partner tries to hold mount while you focus only on escaping.

If you want more focused ways to train this without turning every round into chaos, try adding simple ecological BJJ games that begin from mount and reward either recovery to guard or reversal to top. That gives you realistic timing without needing a huge list of memorized steps.

Solo work can help too, especially if you are sharpening hip movement between classes. Our guide on learn BJJ at home covers useful ways to build movement and understanding outside the gym.

What should beginners study next?

If mount is a recurring problem in your sparring, stay with it for a few weeks instead of bouncing to ten other topics. That kind of focused study is exactly how you build a complete BJJ game over time.

And if you want extra study material, a good escape-focused instructional can speed up your understanding of frames, timing, and defensive layers. This roundup of the best instructionals for escapes and survival is a strong place to start.

Final thoughts

Escaping mount is not about having one magical move. It is about recognizing when to reverse, when to recover guard, and how to stay calm long enough to do either one well.

For most beginners, the right starting point is simple: protect your elbows, bridge with purpose, trap what matters, and use the bridge-and-roll and elbow escape as connected answers rather than separate techniques. If you can do that consistently, mount will stop feeling like the end of the exchange and start feeling like a position you know how to solve.
Filed Under: Techniques

BJJ Guard Retention for Beginners

May 5, 2026 By yourbjjguide

BJJ Guard Retention for Beginners: Frames, Hip Movement, and 5 Recovery Habits

Guard retention is one of the first defensive skills that changes how Brazilian Jiu-Jitsu feels. Before you develop a dangerous guard, you need to stop people from running around your legs, flattening your hips, and settling into side control. For beginners, that usually means learning a few simple habits rather than chasing flashy inversions or advanced counters.

In this guide, you will learn what guard retention really is, what your main job should be when someone starts passing, and five reliable recovery habits that help beginners keep their guard longer and recover it faster.

If you are still building your overall foundation, our BJJ for beginners guide is a good companion to this article.

What Guard Retention Actually Means

Guard retention is your ability to keep your legs, hips, and frames between you and your opponent as they try to pass. In simple terms, it means you stop their chest from getting past your knees and settling into dominant top position.

At beginner level, guard retention is less about memorizing ten specific guards and more about understanding three priorities:

  • Keep your knees and shins between you and the passer.
  • Use frames before their weight fully settles on you.
  • Move your hips early enough to recover angle and distance.

If you lose all three at once, you usually get passed. If you preserve even one of them, you often still have a path back to safety.

Your First Goal Is Not to Attack

Many beginners lose guard because they try to grab submissions or off-balance their partner before they have rebuilt structure. The first goal of guard retention is not offense. The first goal is to rebuild position.

When someone starts passing, ask yourself:

  • Can I put a frame in front of their shoulders or hips?
  • Can I get my knee back inside?
  • Can I turn onto my side instead of staying flat?

Those questions will usually save you faster than thinking about sweeps or submissions.

The 5 Guard Retention Habits Beginners Should Build

1. Frame Before the Pressure Arrives

Good guard retention starts before the pass is complete. If you wait until your opponent has chest-to-chest pressure, your options shrink quickly. Use your hands, forearms, shins, and feet to create barriers early.

Useful beginner frames include:

  • A hand or forearm on the shoulder line to stop forward collapse.
  • A frame near the biceps to slow upper-body control.
  • A shin across the torso or hip line to manage distance.
  • A foot on the hip to stop direct forward pressure.

The key is not to bench-press your partner away. Your frame buys time so your hips and knees can recover position.

2. Stay on Your Side More Than Your Back

Flat hips make retention hard. When you are flat on your back, your legs become slower, your frames weaken, and your opponent can connect their weight more directly into you.

Whenever possible, turn slightly onto one hip so you can move, retract your bottom knee, and re-angle your top leg. Think mobile, not pinned.

This is one reason solo movements matter. If you want extra work between classes, our guide on learning BJJ at home includes movement ideas that support retention, such as shrimping and technical stand-ups.

3. Win the Knee Line Back

One of the simplest guard retention ideas is this: if your knee gets back inside, your guard often comes back with it.

Beginners often focus only on pushing with their arms, but the more important recovery is usually getting a knee back between your body and the passer. That knee can become a shield, a frame, or the start of a new open guard.

When your opponent beats one leg, do not panic. Try to:

  • Frame with your upper body to slow them down.
  • Shrimp just enough to create space.
  • Pummel your knee back inside.
  • Reconnect your second leg once the first barrier is back.

This is a much better habit than kicking wildly or extending both legs without structure.

4. Recover in Layers, Not in One Big Explosion

Guard retention usually happens in steps. First you stop the pass. Then you create a little space. Then you recover one knee. Then you reconnect both legs. Then you square up again.

Beginners often try to do everything in one dramatic bridge or huge shrimp. Sometimes that works, but more often it creates openings for crossfaces, body locks, or quick angle changes.

Think in layers:

  • Layer 1: Stop forward pressure.
  • Layer 2: Turn onto your side.
  • Layer 3: Insert knee or shin.
  • Layer 4: Recover a stable open guard.

This mindset makes retention calmer and more repeatable.

5. Reset to a Guard You Actually Know

After you recover space, do not force yourself into a complicated position you cannot maintain. For most beginners, a good reset means one of three things:

  • Feet on hips with distance.
  • Knee shield style structure.
  • Basic open guard with both knees facing the passer.

The point of guard retention is not to look advanced. It is to regain a position where you can slow the exchange down and make a good next decision.

If you are building a study plan around the fundamentals, our roundup of the best BJJ instructionals for beginners can help you choose material that covers frames, escapes, and positional structure clearly.

Common Guard Retention Mistakes Beginners Make

  • Reaching too far with both arms and giving up inside position.
  • Staying flat instead of turning onto a hip.
  • Trying to invert before they can manage basic frames and knee recovery.
  • Panicking once one leg gets beaten and abandoning the position too early.
  • Pushing hard with the arms but failing to move the hips.

If one sentence sums up beginner guard retention, it is this: do not fight the passer with your arms alone.

A Simple Decision Tree for Guard Retention

When someone starts passing your guard, use this quick sequence:

  • If they are far away, manage distance with feet and shins.
  • If they close distance, frame before chest pressure settles.
  • If they beat a leg, turn onto your side and recover your knee line.
  • If you recover both legs, reset to a stable guard you understand.
  • If they flatten you completely, switch mentally from retention to late-stage escape.

This kind of simple problem-solving approach fits well with constraint-based training. If you want to train that way more deliberately, read how to learn BJJ with the ecological approach.

3 Beginner-Friendly Drills to Improve Guard Retention

1. Knee-Recovery Positional Rounds

Start with your partner halfway through a pass. Your goal is only to recover your knee line and square back up. Keep rounds short so you get many repetitions.

2. Shin-and-Frame Retention Rounds

Start in open guard with one rule: the bottom player may only focus on framing and recovering guard, not sweeping or submitting. This keeps the learning goal clear.

3. Solo Hip-Movement Reps

Use shrimping, hip escapes, side-to-side recoveries, and technical stand-ups to build movement comfort. These do not replace live training, but they help beginners move sooner and more cleanly.

What About Flexibility and Injury Risk?

You do not need extreme flexibility to build decent guard retention. Good timing, angles, and structure matter much more for beginners. In fact, forcing awkward inversions or yanking your knees into positions you cannot control is often a bad trade.

If your knees are already irritated from guard work, passing exchanges, or twisting scrambles, review our guide to common knee injuries in Brazilian Jiu-Jitsu and use conservative judgment about when to modify training.

Final Thoughts

Good guard retention is not magic. It is mostly early framing, smart hip movement, and the habit of bringing your knees back into the fight before the passer settles. If you build those habits first, your guard will last longer and your whole bottom game will feel less frantic.

For beginners, that is a big win. Staying in the exchange long enough to recover structure is often the difference between feeling helpless and feeling like you can actually play Jiu-Jitsu.

Filed Under: Techniques

Closed Guard BJJ Beginners

May 4, 2026 By yourbjjguide

Closed Guard in BJJ for Beginners: Posture Breaks, Angle Changes, and 3 First Attacks

Closed guard is one of the first positions most people learn in Brazilian Jiu-Jitsu, but it can also be one of the first places they get stuck. A lot of beginners can lock their legs around an opponent, but they cannot keep posture broken, create an angle, or turn the position into real offense.

This guide will show you how to make closed guard more functional. You will learn what your main goals are, how to break posture without wasting energy, how to create angles, and three reliable first attacks that fit well together. If you are still building your general foundation, our step-by-step guide to learning BJJ is a good place to pair with this article.

What Closed Guard Is Supposed to Do

Closed guard is not just a position where you hold on and wait. It is a control position from bottom. Your legs limit your opponent’s movement, your grips manage distance and posture, and your hips create the angle needed for sweeps or submissions.

At a beginner level, closed guard works best when you think about it in this order:

  • Break posture
  • Control one or both arms
  • Create an angle
  • Attack or off-balance

If you skip straight to submissions before dealing with posture and angle, your attacks will usually feel weak.

Your First Priority: Break Posture

If your opponent has strong posture inside your closed guard, they can start opening your legs, standing up, or pressuring your hips. Before you think about triangles, armbars, or kimuras, make them carry your weight and pull their head and shoulders forward.

Simple ways to break posture

  • Pull with your legs while drawing your knees toward your chest
  • Use a collar tie or head control to bring their head forward
  • Control one sleeve so they cannot easily post
  • Keep your hips active instead of lying flat

You do not need to yank as hard as possible. Think of posture breaking as a combination of your legs, grips, and timing. Your legs are usually stronger than your arms, so let them do more of the work.

Good cues for beginners

  • Keep your heels engaged instead of crossing your feet loosely
  • Bring your knees in when you pull them forward
  • Keep your head off the mat when you attack
  • Use your grips to guide posture, not to dead-hang on the neck

The Second Priority: Create an Angle

Many beginners try to attack straight underneath their opponent. That usually leads to getting stacked, stuffed, or forced flat. Closed guard becomes much more dangerous when you shift slightly to one side.

Even a small angle can make a huge difference. Your hips line up better for armbars and triangles, and your opponent has a harder time keeping both arms safe.

How to make the angle

  • Pull one arm across your center line
  • Shrimp your hips a few inches out to one side
  • Climb your guard higher if their posture is already broken
  • Use your leg on one side to help pivot your hips

If you want more ways to sharpen live problem-solving from positions like this, the article on learning BJJ with the ecological approach fits well here, especially for building timing rather than memorizing isolated steps.

Three Reliable First Attacks From Closed Guard

You do not need ten submissions at the start. Three connected attacks are plenty. These work well because they all come from posture control, arm isolation, and angle changes.

1. Hip Bump Sweep

The hip bump sweep is one of the best first attacks because it teaches you to sit up, force a reaction, and connect upper-body control with your hips.

Basic idea: When your opponent posts upright, sit up, control an arm, and drive your hips into them as you turn toward the posting side.

What to focus on:

  • Sit up quickly rather than slowly climbing
  • Trap or monitor the posting arm
  • Drive with your hips, not just your shoulders
  • Come up on top immediately after the sweep

This attack is especially useful because it often makes your partner post a hand or pull their elbow back, which opens follow-up attacks.

2. Kimura

The kimura is a natural next attack when your opponent posts a hand on the mat or keeps an arm too far from their body. You can attack it as a submission, but it is also valuable as a control point that leads to sweeps and back takes.

Basic idea: Sit up, isolate one arm, and connect your figure-four grip before your opponent can retract the elbow.

What to focus on:

  • Get their hand away from their center line
  • Clamp your elbow tight once you lock the grip
  • Use your body angle to keep their shoulder exposed
  • Think control first, finish second

If you are also building your study plan outside class, the guide on how to build a complete BJJ game using online instructionals can help you organize positions like closed guard into a more coherent system.

3. Triangle Choke

The triangle is often available when your opponent defends the kimura or leaves one arm in and one arm out. It rewards good angle creation more than brute force.

Basic idea: Control posture, isolate one arm, shoot your leg over the shoulder and neck, then turn the angle before locking the finish.

What to focus on:

  • Break posture before throwing your leg
  • Cut an angle before trying to finish
  • Pull the head only after your legs are in place
  • Use your hamstrings and leg line, not just arm strength

For beginners who want extra study material around foundational positions and attacks, this roundup of the best BJJ instructionals for beginners is a useful companion resource.

How These Attacks Fit Together

Closed guard becomes much easier when you stop treating every move as separate.

  • If posture comes up, attack the hip bump sweep
  • If they post a hand, attack the kimura
  • If they pull an arm across or leave one arm in, attack the triangle

That is enough of a beginner decision tree to start rolling with purpose instead of guessing.

Common Closed Guard Mistakes Beginners Make

Trying to attack from flat on the mat

If your shoulders stay pinned and your hips never move, your opponent can stay safe and patient. Sit up when you need to, shift your hips, and make them adjust.

Using too much arm strength

Beginners often pull the head with their arms and forget their legs are their strongest control tool in closed guard. Use your knees and hips to do more of the job.

Crossing ankles loosely

A lazy closed guard is easy to open. Keep your legs active and connected so your opponent feels your control.

Forcing submissions that are not there

If posture is strong and the angle is poor, reset and improve your control first. You will save energy and create better openings.

Ignoring posture safety in training

When working from bottom, avoid cranking awkwardly on your own knees or twisting hard just to keep your guard closed. If a position feels unstable or painful, reset and rebuild with better structure. For a broader look at staying healthy on the mats, see this guide to common knee injuries in Brazilian Jiu-Jitsu.

A Simple Closed Guard Training Plan for Beginners

If you are new, keep your practice narrow for a few weeks.

  • Round 1 focus: break posture and hold closed guard
  • Round 2 focus: create one angle and recover if you get flattened
  • Round 3 focus: alternate between hip bump and kimura
  • Round 4 focus: look for the triangle only after the reaction appears

This gives you a small but useful game: control, angle, first attack, follow-up attack.

Final Thoughts

Closed guard does not need to be fancy to work. At the beginner level, it becomes effective when you stop chasing random submissions and start respecting the position’s basic sequence: break posture, control an arm, make an angle, then attack.

If you build those habits first, your closed guard will feel much less passive and much more dangerous.

Filed Under: Techniques

Half Guard Underhook Battle BJJ

May 3, 2026 By yourbjjguide

Half Guard Underhook Battle BJJ

Half guard can feel messy when you first start using it. Sometimes you get flattened and stuck. Other times, you almost come up, but your partner cross-faces you, kills your movement, and passes. In many of those exchanges, the real issue is not the sweep itself. It is the underhook battle that happens before the sweep ever starts.

If you can consistently win the underhook from bottom half guard, you give yourself a way to build up to your side, connect your hips to your opponent, and start attacking with purpose. If you lose that battle, half guard often becomes a matter of survival rather than offense. If you are still building your foundations, our step-by-step guide to learning BJJ is a useful companion to the ideas in this article.

Why the underhook matters so much in half guard

The underhook is powerful because it changes the angle of the position. Instead of being pinned flat underneath your opponent, you start turning onto your side and connecting your upper body to theirs. That gives you better access to:

  • Coming up to your knees or elbow
  • Driving into a dogfight-style position
  • Off-balancing your opponent forward
  • Reaching the back or forcing a post
  • Building simple sweeps without needing explosive movement

In practical terms, the underhook helps you stop being carried by the top player’s pressure. You begin to steer the exchange instead.

What winning the underhook actually looks like

Many people think “get the underhook” just means throwing an arm deep and hoping for the best. In reality, winning the underhook means three things happen together:

  • Your body gets onto its side instead of staying flat
  • Your head comes tight to your opponent, usually under their chin or against their ribs
  • Your underhook connects to movement, not just a static grip

If your arm is under their far side but your shoulders are still flat on the mat, you do not really own the position yet. The arm matters, but your angle matters more.

Step 1: Build the position before you reach

The biggest beginner mistake is reaching for the underhook too early. If you try to dig for it while flat on your back, you usually give your opponent an easy crossface, a whizzer, or a chance to staple your shoulders down.

Before you reach, focus on these details:

  • Get onto your side, facing your opponent
  • Use your outside foot to help move your hips underneath you
  • Keep your inside elbow tight so you are not giving space
  • Use your frames to make enough room to turn

This is one reason solo movement and hip mobility still matter outside live training. If you want extra ideas for that side of your development, see how to learn BJJ at home.

Step 2: Hide your hand and dig with timing

Once you are on your side, the underhook usually comes from timing rather than speed. Good moments to dig for it include:

  • When your opponent adjusts their base
  • When they switch from pressure to hand fighting
  • When they try to advance their crossface arm
  • When they briefly lift their chest to move

Think about sliding your hand into space, not swinging your arm in a big motion. A short, hidden path is harder to block. Your goal is to connect tightly to their far side and immediately start coming up.

Step 3: Get your head in the right place

Head position is one of the details that separates a strong underhook from a weak one. After you dig the underhook, bring your head tight to your opponent. Do not leave it low and loose.

Good head position helps you:

  • Stay connected when they sprawl or whizzer
  • Drive forward without overreaching
  • Prevent them from circling easily behind you
  • Start building to your knees with balance

A simple cue is this: underhook with your arm, but win the position with your shoulder and head.

Step 4: Move immediately after you get it

One of the worst habits in half guard is finally getting the underhook and then pausing. If you stop moving, the top player has time to whizzer, crossface, backstep, or flatten you again.

As soon as you connect the underhook, start one of these follow-ups:

  • Come up to your elbow and then your hand
  • Drive into your opponent to force them to post
  • Chase a dogfight position
  • Turn the corner toward the back if they pressure forward

You do not need ten sweep options at first. You just need one or two reliable reactions connected to a clean underhook.

Three simple follow-ups after you win the underhook

1. Come up into the dogfight

This is one of the most natural next steps. Once you are on your side with the underhook, begin rising underneath your opponent. Keep your hips engaged and your head tight. From there, you can run them forward, reach for a better angle, or continue to a finish depending on their reaction.

2. Force a post and chase the sweep

If your opponent bases out with their free hand, that post can become the opening for a basic half guard sweep. The exact finish varies by style, but the principle stays the same: your underhook forces a reaction, and the reaction creates the sweep.

3. Turn the corner to the back

Sometimes the top player pressures you too hard to stop the sweep. That can expose their back. If you stay connected and keep climbing with your underhook, back exposure often comes before a clean reversal.

Common mistakes that make the underhook fail

  • Reaching while flat on your back
  • Ignoring head position after getting the underhook
  • Trying to win with arm strength alone
  • Pausing instead of coming up immediately
  • Accepting the crossface before starting the battle
  • Forgetting to use your lower body to stay connected

If half guard keeps breaking down for you, look at those mistakes before hunting for a more advanced sweep.

What to do when your opponent blocks the underhook

You will not always get it on the first try, especially against experienced training partners. That is normal. The answer is not to force it harder. Usually, you need to improve the layer before the underhook:

  • Create a better angle with your hips
  • Use frames to clear pressure first
  • Win inside elbow position
  • Make your opponent react before you dig

This is also where positional sparring helps a lot. Short, specific rounds from half guard will expose exactly where your sequence breaks down. For that kind of targeted training, this guide on using constraints to target weak spots in your BJJ game fits well with the approach here.

How to practice this without overcomplicating it

Keep your practice narrow at first. Start in bottom half guard and give yourself one job: get onto your side, win the underhook, and come up. That is enough.

A simple training progression looks like this:

  1. Drill the turn to your side and underhook entry slowly
  2. Do light positional rounds where your partner tries to flatten you
  3. Add one follow-up, like coming up to dogfight
  4. Only later add secondary sweeps or back takes

If you prefer studying positions through a more structured system, you may also want to review how to build a complete BJJ game using online instructionals. And if you want a deeper look at the position itself, this Gordon Ryan half guard instructional review is one of the more relevant site resources for continued study.

Final thoughts

The half guard underhook is not just another grip fight. It is often the moment that decides whether you stay stuck underneath or start attacking. If you focus on angle first, dig with timing, keep your head tight, and move as soon as you connect, your half guard will become much more functional.

Do not worry about collecting a dozen sweeps right away. Build a dependable underhook battle first. Once that part becomes reliable, the rest of your half guard game gets much easier to grow.

Filed Under: blog

BJJ Bruises

May 2, 2026 By yourbjjguide

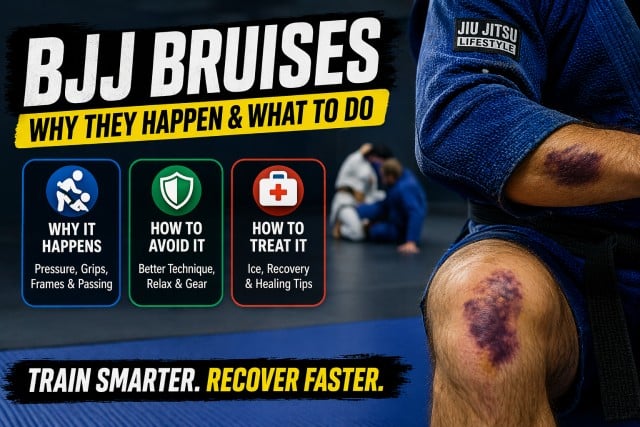
BJJ Bruises: Why They Happen, How to Avoid Them, and How to Treat Them

Learn all about burises in BJJ

BJJ bruises happen because Brazilian Jiu-Jitsu puts repeated pressure on the body through grips, top pressure, frames, passing, and scrambles. Most bruises are minor and heal on their own, but you can reduce them by improving technique, relaxing more during rolls, wearing protective training gear, and managing recovery properly.

If you train Brazilian Jiu-Jitsu regularly, bruises are part of the experience. Some show up on your arms from grips, some on your legs from passing exchanges, and others on your ribs or shoulders after hard rounds. They can look ugly, but most of the time they are a normal part of grappling.

This guide explains why BJJ bruises happen, how to avoid them, how to treat them, and when a bruise may be a sign that something more serious is going on.

What Causes Bruises in BJJ?

A bruise forms when small blood vessels under the skin break and leak blood into the surrounding tissue. In BJJ, that usually happens because of pressure, friction, impact, or repeated contact in the same area.

The most common causes of bruises in BJJ are:

  • Heavy top pressure from side control, mount, and knee-on-belly
  • Gi grips on the sleeves, collar, wrists, and arms
  • Frames and defensive movements under pressure
  • Guard passing exchanges, especially knee cuts and body lock passing
  • Takedowns, scrambles, and accidental collisions
  • Repeated drilling of the same movement

In simple terms, BJJ bruises happen because grappling puts your body under constant pressure from another person who is trying to control, pin, or move you.

Why Do Beginners Get More BJJ Bruises?

Beginners usually bruise more because their bodies are not yet used to the pressure and they often tense up during training.

This happens for a few reasons:

  • You spend more time stuck in bad positions
  • You use strength instead of timing and positioning
  • You absorb pressure instead of redirecting it
  • Your body has not adapted to regular grappling contact yet

As your technique improves, you usually start bruising less. You learn how to frame better, move earlier, and avoid letting people settle their weight on you for long periods.

If you are still building your foundation, our best BJJ instructionals for beginners guide can help you improve the basics that reduce damage during training.

Are BJJ Bruises Normal?

Yes, mild bruising is normal in Brazilian Jiu-Jitsu. Most practitioners get bruises from time to time, especially when training hard, learning new positions, or rolling with stronger training partners.

Typical BJJ bruises:

  • Feel tender for a few days
  • Change color as they heal
  • Fade within 1 to 2 weeks

Bruising becomes more common when training volume goes up, when gi grips are strong, or when you have several hard sessions in the same week.

How to Avoid BJJ Bruises

You cannot eliminate bruising completely in BJJ, but you can reduce it a lot.

1. Improve Your Technique

The better your technique, the less punishment you absorb. Good frames, earlier movement, and better positioning all reduce the amount of pressure you take.

  • Learn to frame before pressure settles
  • Do not stay flat under side control or mount
  • Use angles and structure instead of pure strength

This is one reason system-based instructionals can be so helpful. If you want to improve your defensive structure and movement, see our guide to the best BJJ instructionals.

2. Relax More During Rolling

Tension makes everything worse. When you tense up, you absorb more pressure and react later. Relaxed movement helps you breathe, frame, and escape earlier.

Beginners often bruise more simply because they try to fight every position too hard.

3. Wear Rash Guards, Spats, and Proper Training Gear

Protective clothing helps reduce friction and gives your skin a small buffer during training.

  • Long-sleeve rash guards can reduce grip-related irritation
  • Spats can help limit mat burn and contact on the legs
  • A well-fitted gi can reduce unnecessary rubbing and bunching

If you are still choosing your gear setup, our BJJ gi brand list may help.

4. Choose Training Partners Wisely

Some rounds are technical. Some rounds are hard. If every session turns into a war, bruising tends to pile up fast.

  • Train with controlled partners when you need a lighter day
  • Communicate if you are carrying soreness or a bad bruise
  • Do not feel forced to match reckless intensity

5. Build Strength and Structure

Stronger muscles give the body more support and protection. You do not need bodybuilding-level size, but general strength can help reduce wear and tear.

Areas that matter most:

  • Core
  • Shoulders
  • Neck
  • Hips
  • Legs

How to Treat BJJ Bruises

Most BJJ bruises can be treated with ice, rest, light movement, and time.

1. Ice the Bruise Early

During the first 24 hours, ice can help reduce swelling and discomfort.

  • Apply ice for 10 to 15 minutes at a time
  • Repeat a few times during the day
  • Do not put ice directly on the skin

2. Reduce Pressure on the Area

If the bruise is painful, avoid letting training partners put repeated pressure on it for a few days. You do not always need to skip training, but you may need to modify how you roll.

3. Use Heat Later if Needed

After the first day or two, some people find that light heat helps the area feel better by increasing circulation. This is more useful once swelling has settled down.

4. Stay Hydrated and Recover Well

Recovery matters. Sleep, hydration, and good nutrition all help the healing process.

  • Drink enough water
  • Eat enough protein
  • Do not stack hard sessions if your body is already beat up

5. Train Around It if Needed

If the bruise is minor, you can usually keep training. Just avoid making the same area take repeated damage every round.

How Long Do BJJ Bruises Last?

Most BJJ bruises start improving within a few days and disappear in 1 to 2 weeks.

Smaller bruises may fade quickly. Deeper bruises, especially on the legs, ribs, or hips, can last longer.

In general:

  • Mild bruises: a few days to 1 week
  • Moderate bruises: 1 to 2 weeks
  • Deeper bruises: sometimes more than 2 weeks

When Is a BJJ Bruise a Problem?

Most bruises are harmless, but some signs suggest you should be more careful.

Pay attention if you have:

  • Severe swelling
  • Sharp or worsening pain
  • A hard lump that does not improve
  • Limited movement in a joint
  • Bruising that appears easily without much contact
  • Bruises that do not heal after a couple of weeks

A large, painful swelling may be more than a normal bruise. If something feels off, it is smart to get it checked.

Do You Bruise Less Over Time in BJJ?

Yes, most people bruise less as they gain experience.

That is usually because:

  • Your body adapts to grappling pressure
  • Your timing gets better
  • You stop spending as much time in bad positions
  • You learn how to manage hard rounds better

Experienced grapplers still get bruises, but usually less often and with less surprise.

BJJ Bruises vs Other Common Training Issues

Bruises are common, but they are not the only physical issue BJJ athletes deal with. Mat burn, sore fingers, grip fatigue, stiff necks, and overuse aches are also part of training.

If you are trying to get better at recovering and training smarter, our guide on how to learn BJJ may also help you build better habits on and off the mats.

How to Train Smarter if You Bruise Easily

If you seem to bruise more than everyone else in the room, the answer is not always to stop training. Often it means you need to train a little smarter.

  • Reduce the number of hard rounds each week
  • Spend more time on positional sparring
  • Choose technical rounds over ego rounds
  • Improve escapes and defensive frames
  • Use instructionals to clean up weak areas

If you are an older grappler, this matters even more. Our guide to the best BJJ instructionals for older grapplers covers learning resources built around timing, efficiency, and smarter movement.

Frequently Asked Questions

Why do I get bruises from BJJ?

You get bruises from BJJ because grappling puts repeated pressure on the body through grips, frames, top pressure, passing, and scrambles. Small blood vessels under the skin break and leak into the surrounding tissue.

Are BJJ bruises normal?

Yes, mild bruising is normal in BJJ. Most bruises are harmless and fade within 1 to 2 weeks.

How do you treat BJJ bruises?

Treat BJJ bruises with ice during the first 24 hours, reduced pressure on the area, good hydration, and time. Most minor bruises heal on their own.

How can I avoid bruising in BJJ?

You can reduce bruising by improving technique, relaxing more during rolls, wearing rash guards or spats, choosing training partners wisely, and managing recovery better.

Do BJJ bruises get better over time?

Yes, most people bruise less as they gain experience because their body adapts and their technique improves.

When should I worry about a bruise from BJJ?

You should be more careful if the bruise causes severe swelling, sharp pain, a hard lump, limited movement, or does not improve after a couple of weeks.

Final Thoughts

BJJ bruises are common, especially when you are new, training hard, or spending too much time under pressure. In most cases, they are not a big problem. The key is learning how to reduce unnecessary damage through better technique, smarter training, and better recovery.

If your goal is to stay on the mats longer and improve faster, focus on the habits that matter most: better movement, better defense, better partner selection, and better recovery between sessions.

Filed Under: blog

Jiu Jitsu Elbow Pain

April 30, 2026 By yourbjjguide

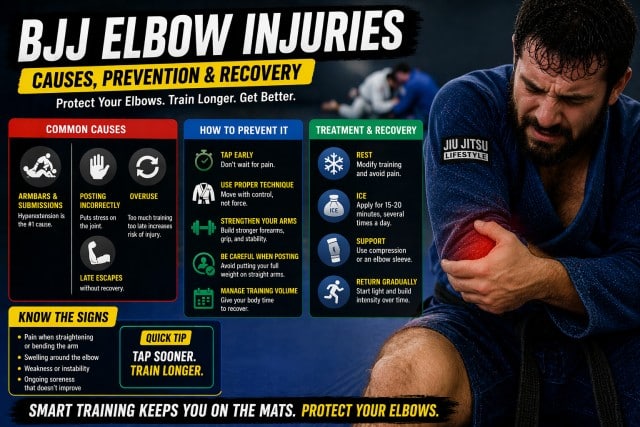
BJJ Elbow Injuries: Causes, Prevention, and Treatment

bjj elbow injuries

BJJ elbow injuries are most commonly caused by arm locks like armbars, overuse, and posting incorrectly during training. Most injuries can be avoided by tapping early, using proper technique, and managing training intensity.

Elbow injuries are one of the most frequent joint issues in Brazilian Jiu-Jitsu. While they are usually not as severe as knee injuries, they can still keep you off the mats if ignored.

This guide explains why elbow injuries happen in BJJ, how to prevent them, and how to recover properly.

What Causes Elbow Injuries in BJJ?

The main cause of elbow injuries in BJJ is hyperextension from submissions, especially armbars.

Other common causes include:

  • Trying to escape submissions too late
  • Posting your arm during scrambles or takedowns
  • Overuse from repeated training and drilling
  • Poor technique when framing or defending

Most elbow injuries happen gradually or in a split second when a joint is forced past its natural range of motion.

—

Most Common Types of BJJ Elbow Injuries

1. Hyperextension (Armbar Injuries)

This is the most common elbow injury in BJJ.

It happens when the arm is straightened beyond its normal range during an armbar.

Symptoms:

  • Pain when straightening the arm
  • Swelling around the elbow
  • Weakness or instability

2. Tendonitis (Overuse Injury)

Repeated stress from gripping, pulling, and training volume can lead to elbow tendonitis.

Symptoms:

  • Dull, ongoing pain
  • Stiffness in the joint
  • Pain during gripping or pulling

—

3. Sprains and Strains

These occur when ligaments or surrounding muscles are overstretched.

They are often caused by sudden movements or poor positioning during scrambles.

How to Avoid Elbow Injuries in BJJ

Most elbow injuries in BJJ are preventable with proper habits.

1. Tap Early

This is the most important rule.

Do not wait until pain. If your arm is fully extended and controlled, tap immediately. Trying to escape late is the most common cause of injury.

2. Avoid Explosive Escapes

Exploding out of armbars or submission attempts can put your elbow at risk.

Use controlled, technical escapes instead of sudden force.

3. Be Careful When Posting

Posting your arm during scrambles or takedowns can put stress on the elbow.

Try to avoid posting your arm in awkward angles or under heavy pressure.

4. Strengthen Supporting Muscles

Stronger muscles around the joint help protect the elbow.

  • Forearm strength
  • Grip endurance
  • Upper arm stability

5. Manage Training Volume

Too much training without recovery increases injury risk.

If your elbows feel sore, reduce intensity or take a lighter training day.

How to Treat BJJ Elbow Injuries

Most mild elbow injuries can be treated with rest, ice, and gradual return to training.

1. Rest and Modify Training

Avoid movements that cause pain. You may still train, but adjust your intensity and avoid stressful positions.

2. Ice the Area

Use ice during the first 24–48 hours to reduce swelling and inflammation.

3. Compression and Support

Elbow sleeves or light compression can help with stability and comfort during recovery.

4. Gradual Return

Do not rush back into full intensity. Start with light drilling and controlled rolling.

How Long Do Elbow Injuries Take to Heal?

Recovery time depends on the severity of the injury.

  • Mild strain: a few days to 1–2 weeks
  • Moderate injury: several weeks
  • Severe injury: months (or longer)

Ignoring elbow pain often leads to longer recovery times.

When Should You Stop Training?

Stop or modify training if you experience:

  • Sharp pain in the elbow
  • Swelling or instability
  • Limited range of motion

If pain persists, it is better to rest early than deal with a long-term injury.

How Elbow Injuries Compare to Other BJJ Injuries

Elbow injuries are common but usually less severe than knee injuries. However, they can still affect your ability to train consistently.

If you want a broader overview, read our guide on the most common BJJ injuries.

For minor issues like impact damage, also see our BJJ bruises guide.

—

Frequently Asked Questions

What is the most common elbow injury in BJJ?

Hyperextension from armbars is the most common elbow injury in Brazilian Jiu-Jitsu.

Should I tap early to armbars?

Yes. Tapping early is the best way to avoid elbow injuries. Waiting too long increases the risk of damage.

Can you train with an elbow injury?

You can train lightly depending on the severity, but you should avoid positions that stress the elbow.

How do I strengthen my elbows for BJJ?

Focus on forearm strength, grip training, and controlled resistance exercises to support the joint.

How long does elbow pain last after BJJ?

Mild pain can last a few days, while more serious injuries may take weeks or longer to heal.

Final Thoughts

Just as bruises in BJJ are common, elbow injuries in BJJ are also common but often preventable. The key is to train with control, respect submissions, and listen to your body.

If you focus on technique and smart training habits, you can reduce your risk and stay consistent on the mats.

Filed Under: BJJ Injuries

Phuket vs Bangkok vs Rayong for BJJ

April 23, 2026 By yourbjjguide

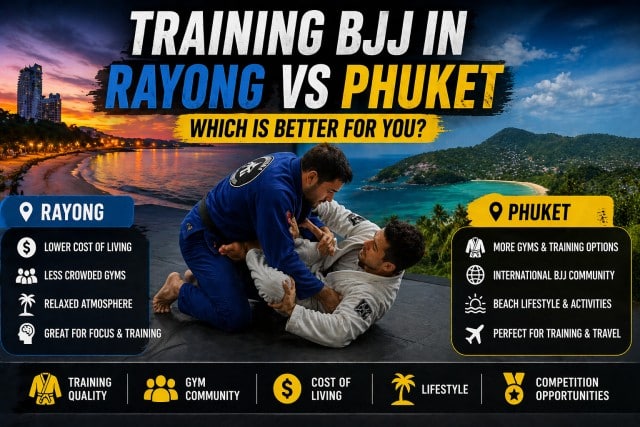
Phuket vs Bangkok vs Rayong for BJJ – Where Should You Train in Thailand?

we have compared bjj in phuket vs rayond

Where is the best place to train BJJ in Thailand?

Phuket is best for competition training, Bangkok offers structured technical gyms, and Rayong is ideal for beginners and those who want a more relaxed, beachside BJJ experience.

Thailand is one of the top destinations in the world for Brazilian Jiu Jitsu, but choosing where to train can make a big difference in your experience.

The three most common locations are Phuket, Bangkok, and Rayong — and each offers something completely different.

This guide breaks down the pros and cons of each so you can decide where to train based on your level and goals.

Phuket vs Bangkok vs Rayong – Quick Comparison

Location Best For Training Style Environment
Phuket Competition training High intensity Busy, tourist-heavy
Bangkok Technical training Structured City environment
Rayong Beginners & lifestyle Relaxed Beach, quiet

Phuket for BJJ – Best for Competition Training

Phuket is the most well-known destination for combat sports in Thailand.

You will find a high concentration of gyms, experienced coaches, and serious athletes training every day.

This makes it a strong choice if your goal is to compete or train at a high level.

Pros of Training BJJ in Phuket

  • Large number of gyms
  • Strong competition environment
  • High-level training partners
  • Multiple classes per day

Cons of Training BJJ in Phuket

  • Can be crowded and tourist-heavy
  • More expensive than other areas
  • Not always beginner-friendly

If you are new to BJJ, this environment can feel overwhelming.

Bangkok for BJJ – Best for Technical Training

Bangkok offers a different kind of BJJ experience.

Instead of beach gyms and fight camps, you get more structured academies with a focus on technique and consistency.

Pros of Training BJJ in Bangkok

  • High-quality instruction
  • Structured classes
  • Strong local community
  • Easy to access

Cons of Training BJJ in Bangkok

  • No beach lifestyle
  • Busy city environment
  • Less of a “training trip” feel

Bangkok is a good option if you already live in the city or want consistent, technical training without distractions.

Rayong for BJJ – Best for Beginners and Lifestyle

Rayong is less known compared to Phuket and Bangkok, but it offers a very different experience.

This is where you find smaller, more relaxed gyms with a focus on training, recovery, and lifestyle.

A good example is Rayong Brazilian Jiu Jitsu, located at Tree Roots Retreat.

Pros of Training BJJ in Rayong

  • Beginner-friendly environment
  • Less crowded
  • Close to Bangkok
  • Beach access
  • Sauna and ice baths
  • Surfing options

Cons of Training BJJ in Rayong

  • Fewer gyms to choose from
  • Less competition-focused

If your goal is to enjoy training, improve steadily, and avoid burnout, Rayong is one of the better choices.

Which Location Is Best for You?

The best place to train depends on your level and what you want from your trip.

  • Choose Phuket if you want high-level competition training
  • Choose Bangkok if you want structured, technical classes
  • Choose Rayong if you are a beginner or want a more relaxed experience

Many beginners find that starting in a less intense environment makes it easier to stay consistent and enjoy training.

Can Beginners Train BJJ in Phuket?

Yes, but it depends on the gym.

Some gyms are beginner-friendly, but overall the environment is more intense compared to other locations.

For many beginners, starting somewhere like Rayong Brazilian Jiu Jitsu is a smoother introduction.

Is Rayong Better Than Phuket for BJJ?

It depends on your goals.

Rayong is not better for competition training, but it can be better for:

  • Beginners
  • Casual practitioners
  • People who want a balance between training and lifestyle

Phuket is stronger for high-level training, while Rayong is stronger for overall experience and consistency.

Final Thoughts

Phuket, Bangkok, and Rayong all offer something different when it comes to BJJ in Thailand.

There is no single “best” location — only the one that fits your level and goals.

If you are focused on competition, Phuket or Bangkok will likely be better choices.

If you are a beginner or want a more relaxed setup with beach access and recovery options, Rayong is hard to beat.

For that type of experience, Rayong Brazilian Jiu Jitsu is worth checking out.

Frequently Asked Questions

Which city in Thailand is best for BJJ?

Phuket is best for competition, Bangkok for technical training, and Rayong for beginners and lifestyle training.

Is Phuket or Bangkok better for BJJ?

Phuket is better for intense training and competition, while Bangkok is better for structured and technical classes.

Is Rayong good for BJJ beginners?

Yes, Rayong is one of the best options for beginners due to its relaxed and less intimidating training environment.

Can you train BJJ by the beach in Thailand?

Yes, locations like Rayong offer beachside training with a quieter and more relaxed atmosphere.

Filed Under: blog, training camps

Best Free BJJ Instructionals and YouTube Channels for Beginners

April 19, 2026 By yourbjjguide

Best Free BJJ Instructionals and YouTube Channels for Beginners

free instructional for learning bjj

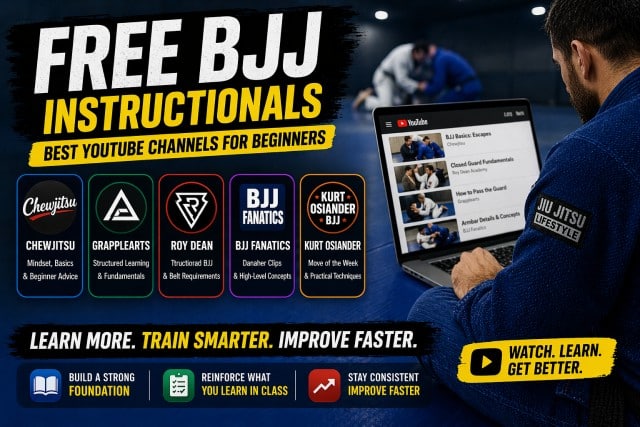
Looking for the best free BJJ instructionals? Some of the top YouTube channels for beginners include Chewjitsu, Grapplearts, Roy Dean, and BJJ Fanatics. These channels offer high-quality techniques, fundamentals, and structured learning — completely free.

Starting Brazilian Jiu-Jitsu can be intimidating — physically, mentally, and even financially. Between gym fees, gear, and paid instructionals, many beginners look for ways to improve without spending more money.

The good news is that there is a huge amount of high-quality free BJJ content available online. The key is knowing which channels actually teach useful fundamentals and not just random techniques.

This guide covers the best free BJJ instructionals and YouTube channels for beginners, so you can build a strong foundation and improve faster.


Best Free BJJ Instructionals (Quick Answer)

  • Best overall: Chewjitsu
  • Best structured learning: Grapplearts
  • Best traditional approach: Roy Dean
  • Best advanced concepts (free clips): BJJ Fanatics
  • Best raw practical techniques: Kurt Osiander

If you are serious about improving faster, you should also combine free content with structured systems. See our best BJJ instructionals guide for more complete learning options.


1. Chewjitsu (Nick Albin)

Channel: Chewjitsu on YouTube

Why It’s Great:

Nick “Chewy” Albin is one of the most beginner-friendly BJJ instructors online. His content goes beyond techniques and helps new students understand how to train, think, and improve.

  • Beginner Q&A and mindset advice
  • Clear breakdowns of fundamentals
  • Escapes, sweeps, and positional basics
  • Consistent uploads

Best For: Beginners who want both technique and guidance on training.


2. Stephan Kesting (Grapplearts)

Channel: Grapplearts on YouTube

Why It’s Great:

Stephan Kesting offers one of the most structured free BJJ learning paths online. His content is calm, clear, and designed to help beginners build fundamentals step by step.

  • Structured playlists (BJJ basics, self-defense, fundamentals)
  • Free guides and training resources
  • Concept-based teaching

Best For: Beginners who want structured, step-by-step learning.


3. Roy Dean Academy

Channel: Roy Dean on YouTube

Why It’s Great:

Roy Dean focuses on clean technique and traditional Brazilian Jiu-Jitsu. His videos are well-produced and easy to follow, especially for visual learners.

  • Belt requirement videos
  • Clear demonstrations
  • Strong focus on fundamentals

Best For: Students who prefer a traditional and structured style.


4. BJJ Fanatics (Free Clips)

Channel: BJJ Fanatics on YouTube

Why It’s Great:

This channel provides free clips from world-class instructors like John Danaher and Gordon Ryan. While not full instructionals, the insights are extremely valuable.

  • High-level concepts
  • Short, focused technique clips
  • Exposure to elite-level coaching

Best For: Beginners who want to see high-level concepts early.


5. Kurt Osiander – Move of the Week

Channel: Kurt Osiander on YouTube

Why It’s Great:

Kurt’s teaching style is simple, direct, and practical. The production is basic, but the techniques are effective and easy to apply.

  • Real-world techniques
  • Strong focus on fundamentals
  • No unnecessary complexity

Best For: Beginners who want simple, effective techniques.


Are Free BJJ Instructionals Enough?

Free BJJ instructionals can be very effective, but only if used correctly.

They are best used to:

  • Reinforce what you learn in class
  • Review techniques at your own pace
  • Explore different instructors

However, free content is often unstructured. That is why many practitioners eventually move to more complete systems. If you want to go deeper, check our full BJJ instructional guide.


How to Learn from YouTube BJJ Videos

The biggest mistake beginners make is watching too many random techniques.

Instead:

  • Focus on one position (guard, side control, mount)
  • Follow a playlist, not random videos
  • Practice what you watch in training
  • Repeat the same techniques until they work

Structured learning always beats random learning.


Frequently Asked Questions

What are the best free BJJ instructionals?

The best free BJJ instructionals come from YouTube channels like Chewjitsu, Grapplearts, and BJJ Fanatics. These provide high-quality techniques and concepts for beginners.

Can you learn BJJ from YouTube?

You can learn a lot from YouTube, but it should be combined with live training. Videos work best as a supplement, not a replacement.

Which BJJ YouTube channel is best for beginners?

Chewjitsu and Grapplearts are two of the best channels for beginners because they focus on fundamentals and structured learning.

Are free BJJ instructionals worth it?

Yes, they are worth it for beginners. They allow you to improve without extra cost and help reinforce what you learn in class.

What should beginners focus on in BJJ?

Beginners should focus on escapes, positioning, and basic submissions rather than advanced techniques.


Final Thoughts

Free BJJ instructionals are one of the best tools available for beginners. If you use them correctly, they can help you improve faster and build a strong foundation.

The key is to stay focused, follow structured content, and apply what you learn during training.

Filed Under: blog

  • « Previous Page
  • 1
  • 2
  • 3
  • 4
  • 5
  • …
  • 13
  • Next Page »

BJJ Fanatics

BJJ Fanatics latest videos

BJJ Fanatics: The number one source on the internet with the best instructional videos and promotions.

Explore BJJ Fanatics Now

Scrimmage Takedowns

Gordon Scrimmage Lower-body takedowns

Gordon Ryan’s approach to scrimmage-based lower-body takedowns combines the precision of wrestling with the strategic timing of jiu-jitsu.

Explore Gordon’s Latest Video

Further Faster Bundle

Dahaner Go Further Faster Bundle

John Danaher Go Further Faster: Master the fundamentals with clarity and purpose—just like Danaher’s top students.

Further Faster Bundle Deal


Your BJJ Guide Copyright © 2026 ·

We use cookies to ensure that we give you the best experience on our website. If you continue to use this site we will assume that you are happy with it.